
GIFs are fun ways to share content on your social media accounts, and with Canva, creating your own professional-looking GIFs has never been easier.
In this article, I’ll walk you through the simple steps to make a GIF in Canva.
Tools


No time to read the post? Scroll down to watch the quick video 🎥


I get commissions for purchases made through some of the links in this post. There is no extra cost to you. See my full disclosure here.
Make a Fun GIF in Canva
Step 1: Open a New Video Template in Canva
To get started, log into your Canva account and select “Create a design” from the dropdown menu in the top left corner. From there, select “Video” to open up a range of video templates that are perfect for social media posts like an Instagram Reel, TikTok, and Facebook videos. Choose a template that fits your needs and style, and click on it to get started.


Step 2: Search for a Video
Once you’ve opened up your video template, it’s time to start adding elements to your design. Click on “Elements” from the left side menu panel to open up a range of options to choose from. You can search for a video file or any other graphic elements you want to include in your design. Canva adds new videos all the time.

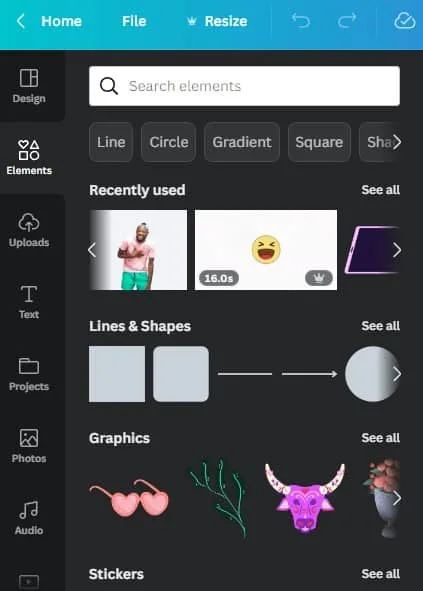
Step 3: Size the GiF Video
Once you’ve found the video you want to, click and drag it into the Canva design. You can adjust the size of the video by clicking and dragging the edges of the video to make it fit the canvas.
Step 4: Edit the Video Length
To create a GIF, you need to make sure your video is short enough. Click on the play button of the video and watch it to see how long it is. If you pick a long video, you want to get a slightly slower time frame.
Click on the “Edit Video” button located on the top menu in Canva. This button will open up the video editor. Here, you can shorten the length of the video to around 3.5 seconds by dragging the slider at the top.


Step 5: Download Your GIF
Once you’re happy with your GIF, it’s time to download it. Click on the “Share” button located on the top right corner of the screen. From there, select “Download” and a dropdown menu will appear. From the download button options, choose “GIF” as the file type.
And voila! Your very own animated GIF is now ready to share on social media.


How to Use a Static Image to Make a Canva GIF
Videos aren’t the only way to make gif images. I think they are the easiest way to make gifs but you can also use photos to make them. They won’t have as much movement as a video but they’ll still get the job done.
Choose a photo and clear the background. Canva Pro has a transparent background feature that you can use. Just click on it to remove anything in the background of the picture.
Next, click on the animate button and pick from one of the three photo movements. From here, you can duplicate the first frame to get a second page. Change the second page by giving it micro animations. Try flipping it. Now you can save the two pages as a gif file format.
Canva Pro vs the Free Version of Canva
If you’re a Canva Pro subscriber, you’ll have access to even more features and options to enhance your designs. Canva Pro offers unlimited graphics, videos, audio, and photos to choose from.
Plus, you can add your own affiliate links to your designs and earn commissions on any purchases made through your designs. It’s a great way to monetize your designs and make some extra cash.
Making a GIF in Canva is a simple and fun process. With the right tools and a little bit of creativity, you can create eye-catching GIFs that you can share in your Instagram stories and hey, maybe it’ll even go viral! So why not give it a try today? And if you’re not yet a Canva Pro subscriber, you can sign up here.
