Crafting your own DIY Christmas village paper houses is a fun and simple way to add a personal touch to your holiday decorations.
With just some paper, scissors, and a little creativity, you can create charming little homes that bring warmth and joy to your festive display.
Grab your supplies and let’s get started on this delightful project!
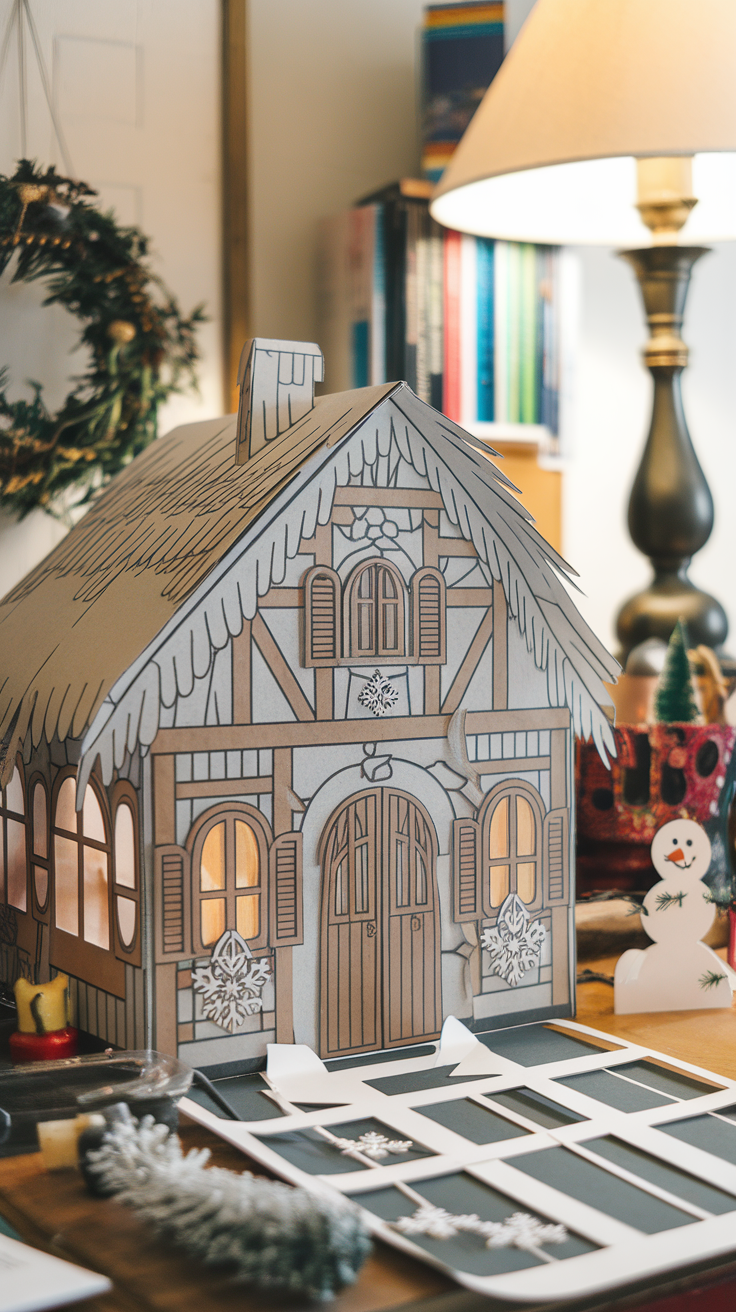
Creating the Perfect Paper House Template
I get commissions for purchases made through some of the links in this post. There is no extra cost to you. See my full disclosure here.
Making your own Christmas village paper houses can be a fun project. You can find plenty of free printables online to help you get started.
Whether you want to create cardboard gingerbread houses DIY or elaborate paper mache Christmas villages, the possibilities are endless!
Incorporating LED Lights for a Magical Glow
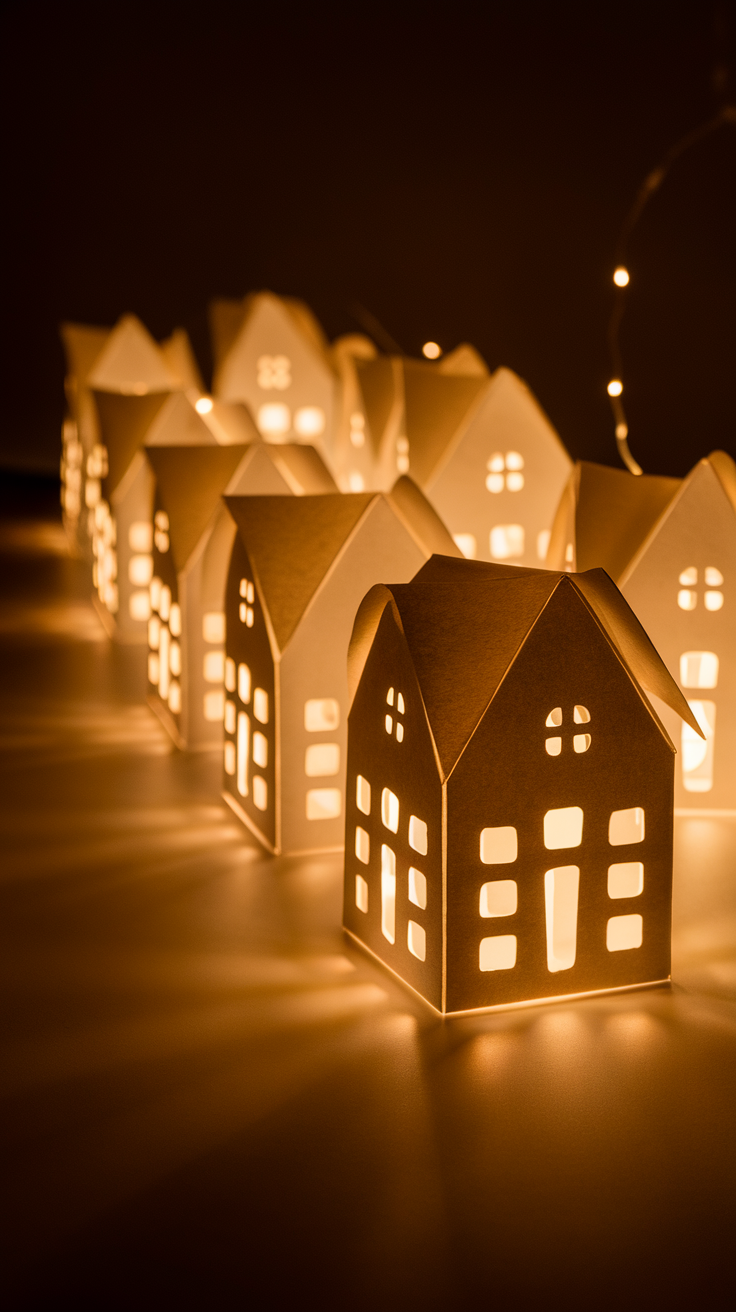
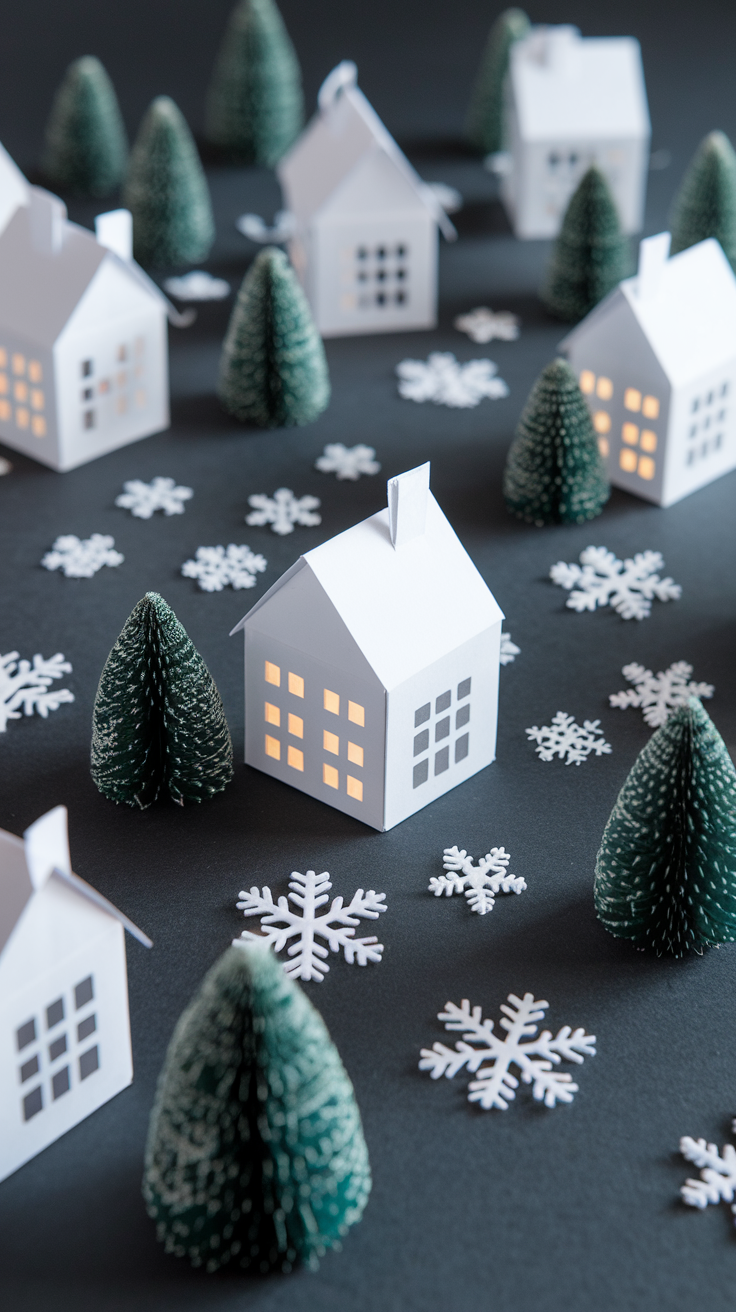
Adding LED lights to your homemade Christmas village can really bring it to life. These warm lights shine through cardboard house cutouts, creating a cozy and inviting vibe.
Use a laser cutting machine to make your cutouts precise and save you time.
It’s an easy way to make your Christmas village DIY cardboard project even more special!


How to Make a Paper Christmas Village with a Laser Cutting Machine
Creating a glowing paper Christmas village is a fun and festive project! Follow these step-by-step instructions to make your own.
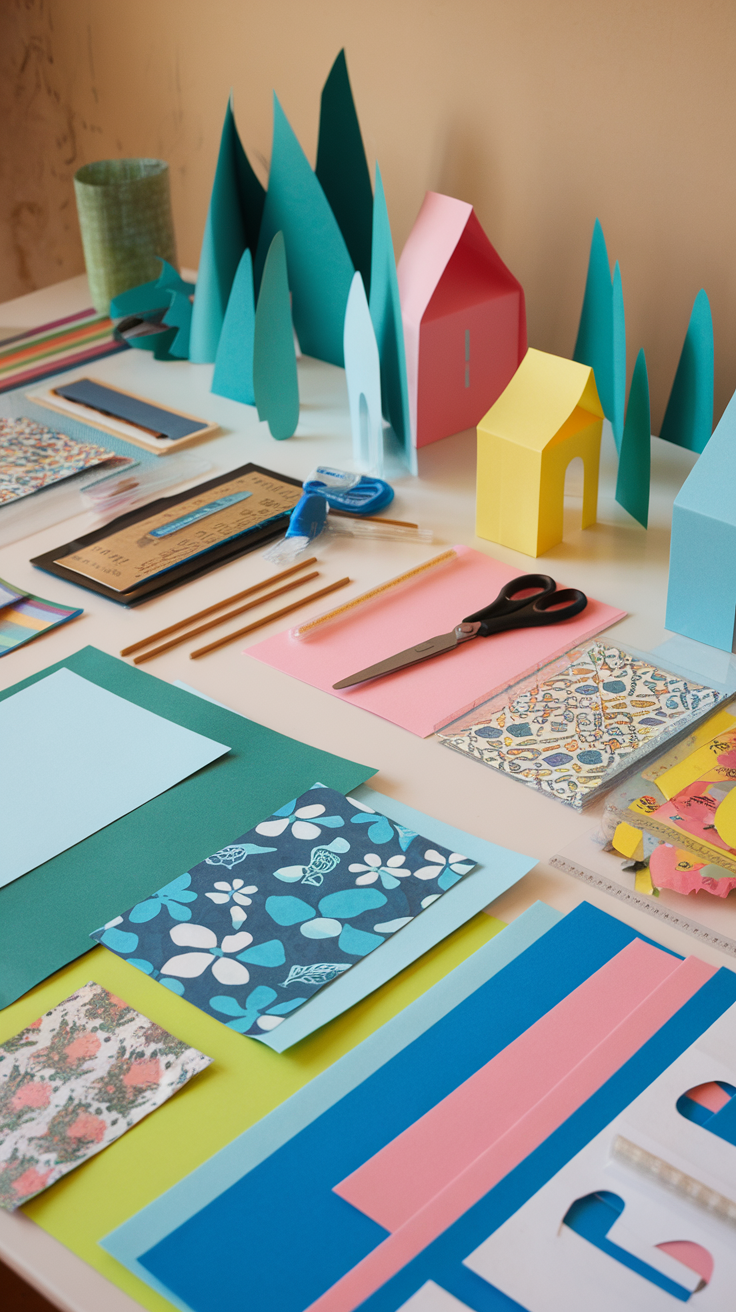
Supplies Needed:
- Laser Cutting Machine (e.g., xTool)
- White or Cream Cardstock (for sturdy paper houses)
- LED Tea Lights or String Lights (for the glow)
- Glue or Double-sided Tape
- Cutting Mat (if necessary for your machine)
- Computer with Design Software (e.g., xTool Creative Space, Adobe Illustrator)
- Christmas Village SVG Files (search for templates or design your own)
- Tweezers (optional, for precision gluing)
- Ruler (to ensure accurate folding lines)
Step-by-Step Instructions:
- Prepare the SVG Files
- Download or create SVG files for your Christmas village houses. These should include cut lines for windows and doors and score lines for folds.
- Load the Material
- Place your cardstock on the laser cutter’s bed. Ensure it’s flat and secure using the machine’s clamps or masking tape.
- Set Up the Design
- Open your SVG file in the laser cutting software. Adjust the design’s size if necessary to fit your machine’s cutting area.
- Adjust Laser Settings
- Select settings appropriate for cardstock (e.g., low power and medium speed). Test on a scrap piece first to ensure clean cuts.
- Cut and Score
- Run the cutting machine. The laser will cut out the houses’ outlines, windows, and doors and score the fold lines.
- Remove and Clean
- Carefully remove the cut pieces from the laser cutter. Use tweezers to poke out small details like windowpanes if needed.
- Assemble the Houses
- Fold along the scored lines to create crisp edges.
- Glue or tape the tabs to form the 3D structure of each house. Let them dry thoroughly before handling further.
- Add Lights
- Place LED tea lights or string lights inside the paper houses. Ensure the lights are battery-operated to avoid heat damage.
- Arrange the Village
- Set up your village on a mantle, table, or shelf. Experiment with placement to create a cozy, glowing scene.
- Optional Decorations
- Add faux snow, miniature trees, or other festive details around the village to complete the look.
With these steps, you’ll have a magical paper Christmas village perfect for decorating your home or gifting to loved ones!

Assembling the Houses with Precision and Care
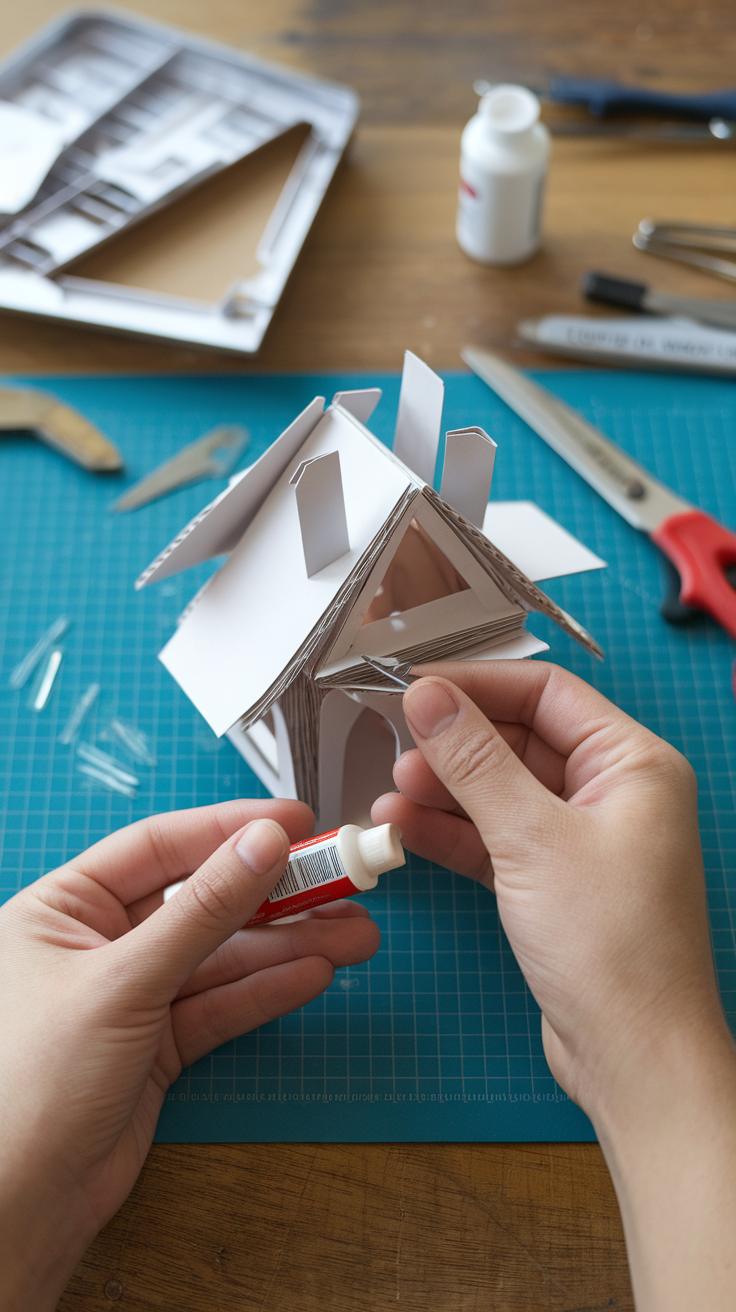
Putting together your Christmas village paper houses can be a fun and rewarding task.
With a little glue and some Christmas house cutouts, you can create a charming display that brings joy to the season. Don’t forget to check out those homemade Christmas village ideas for even more inspiration!

Adding Decorative Touches with Paint and Glitter
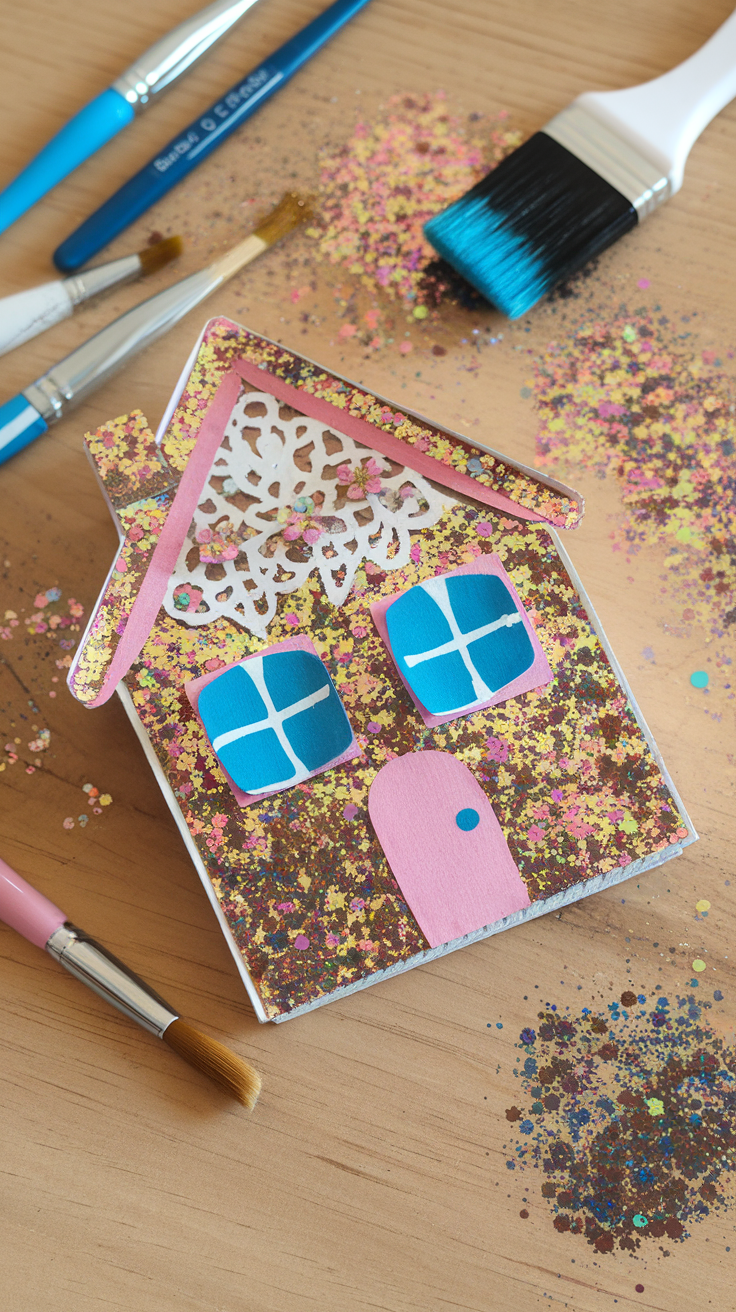
Sprucing up your DIY Christmas village can be a blast! Use paint and glitter to make your paper mache Christmas village really shine.
These simple decorative touches can transform cardboard box Christmas villages into festive displays that will wow everyone!
Designing a Cozy Winter Wonderland Scene
Creating a cozy winter scene can be so much fun! Using a christmas village paper template, you can make charming cardboard gingerbread houses DIY style.
Add some snowflakes and trees, and you have a delightful setup perfect for the holidays.

Choosing the Right Materials for Your Village
When creating a Christmas village, the materials you choose play a crucial role in the final appearance. Cardboard is a great option for a DIY Christmas village, whether you’re making houses from cardboard boxes or delightful gingerbread houses with cardboard.
To make your display even more attractive, think about using creative elements like paper mache or colorful paper templates. Also, adding miniature Christmas village people and vintage Christmas trees alongside the houses can add a lively and nostalgic feel to your scene.
Utilizing Recycled Materials for Eco-Friendly Crafts
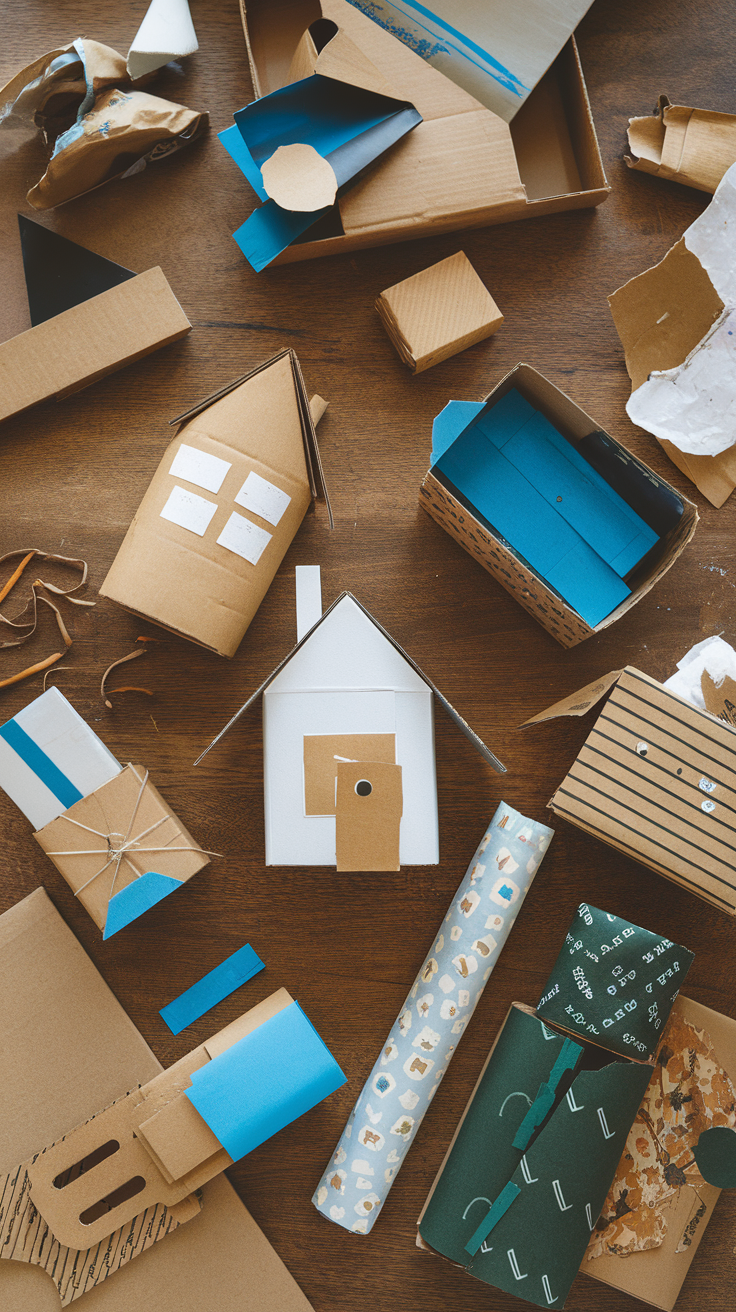
Building a Christmas village display is such a fun project, especially when you can use recycled materials! Why not whip up a cozy nativity scene to give your display a meaningful vibe?
When it comes to showing off your creations, you can get creative—try using a fun ladder display for your Christmas village houses or set them up on dedicated shelves.
And don’t forget about the lights! Adding some twinkling lights can really make your village pop. Get ready to spread some holiday cheer with your unique display this season!
Creating Unique House Themes for Your Village


Creating a charming Christmas village is a blast and super simple! You can use DIY Christmas village displays and paper mache techniques to add some flair to your setup.
Don’t forget to incorporate fun Christmas village accessories to really bring your festive scene to life.
A festive color palette is key, too! It’s all about enjoying those easy holiday crafts and making your village uniquely yours. So grab your supplies and let the holiday spirit flow!
Involving Kids in the DIY Paper House Project


Getting kids involved in making a Christmas village is a fun way to spark their creativity. They can use simple materials like cardboard and colorful paper to build their own.
Setting Up a Display for Your Completed Village
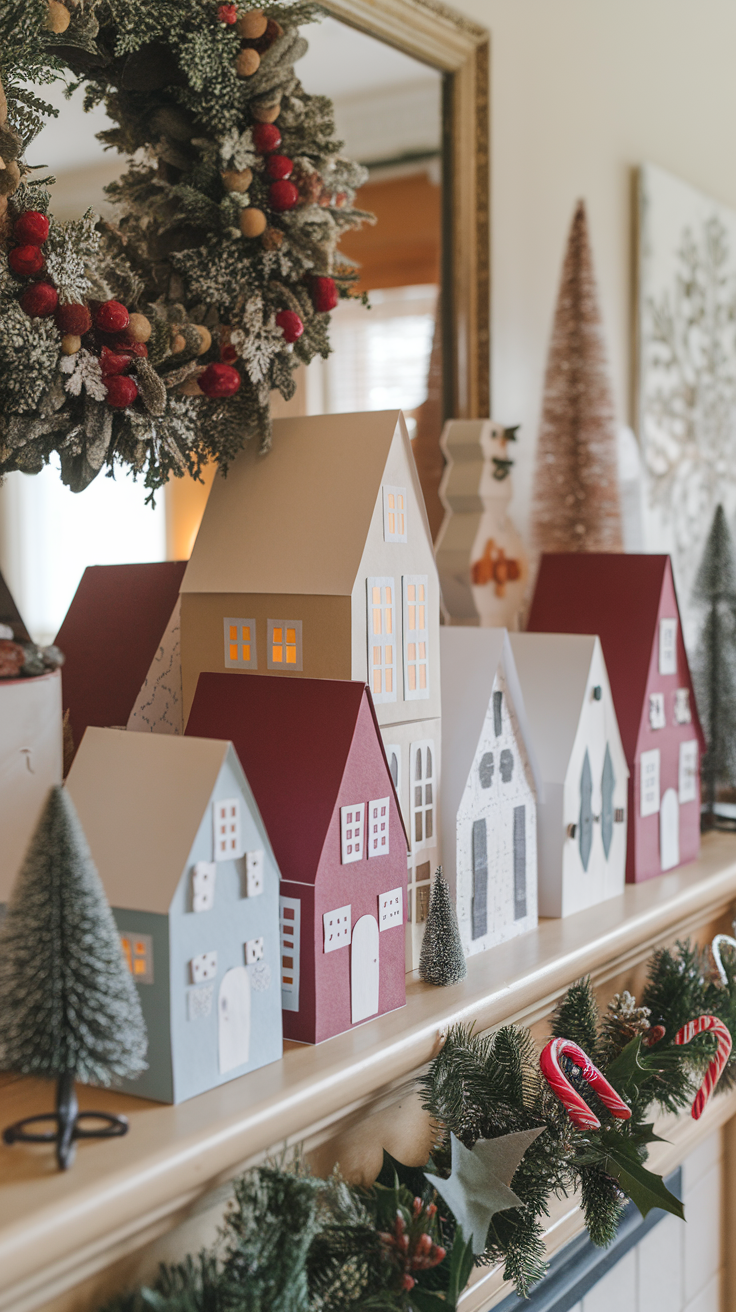
Creating a cozy display for your paper mache Christmas village can really bring your holiday spirit to life.
Use a few homemade Christmas village ideas, like Christmas house cutouts or a cardboard box Christmas village, to add charm to your setup.
Don’t forget to incorporate some festive decorations, and your village will shine bright this season!