
Did you get a new cutting machine but you have no clue how to cut vinyl with it?
Your Cricut machine is a versatile piece of equipment that you can use for a range of craft projects using adhesive vinyl.
If you’ve never done it before, it may look daunting figuring out how it all works, but fear not— this guide will walk you through the process, and you’ll soon be crafting away like a pro.

I get commissions for purchases made through some of the links in this post. There is no extra cost to you. See my full disclosure here.
What you’ll need
Here’s what you’ll need for your vinyl project.
- Cricut machine– different brands may have slightly different features, but the general way to use the machine doesn’t differ much.
- Cutting mat– you’ll need a non-slip grip cutting mat.
- Adhesive vinyl.
- Cricut tools set with a weeding tool.
Note: Adhesive vinyl isn’t the same as heat transfer vinyl. You can tell the two apart by looking at the bottom layer. HTV has a liner above the vinyl through which you can clearly see under the liner. The bottom layer of adhesive vinyl has a liner with gridlines.

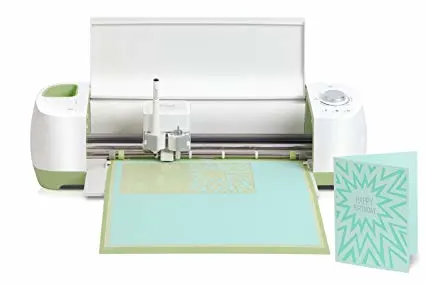
Cutting vinyl with Cricut
- Step 1: Make your project design in the Design Space.
- Step 2: Remove the clear liner from your cutting mat and place the mat on a clean flat surface.
- Step 3: Unroll the adhesive vinyl so that the side with the paper liner is facing down. Then lay the vinyl straight on the mat. The gridlines on the vinyl should align with the gridlines on the grip mat. Press the vinyl flat to smooth it out on the mat and make sure it sticks securely onto the surface.
- Step 4: Select the right settings for adhesive vinyl inside the design space.
- Step 5: Press the load button to load your mat into the machine. You should see a flashing “go” button when it loads correctly. Press the “go” prompt and the machine will start cutting.
Side Note: Do you need a special blade to cut vinyl with Cricut? You should use a fine point blade to get the finest and most precise cut.
- Step 6: Once the screen shows you that the machine has finished cutting, press the load(unload) button to remove the mat.
And that’s it—you are done. Now proceed to the next part of your project.
With the weeding tool, remove the unwanted parts of your design. Then cut out some transfer tape (roughly as big as your design), peel off the paper liner, and put it on the design.
Flip your mat over and gently pull it away from the vinyl. Then burnish your design onto the tape. Now transfer your image to the item you are printing on, and voila, your project is done.


FAQs
Turn the selection dial to the custom setting. Then browse all materials and choose the permanent vinyl option. You can do the same for temporary vinyl.
For best results, the shiny side should face down when you cut. The vinyl (the side you will print on) should face upwards.
Final word
So there it is—vinyl projects are fun and easy with a Cricut. Now go ahead and get crafting!
