
Copy These 9 Steps to Upload Images to Cricut on iPad: Make it Easy!
Did you know that your iPad can be your best friend when it comes to crafting with Cricut?
Whether you’re a DIY enthusiast who loves creating your own cut files or you prefer purchasing them, you can easily get them onto your favorite tablet.
In this blog post, I’ll walk you through a step-by-step guide on how to upload images to the Cricut Design Space from the iOS App.
This quick feature lets you customize your designs with a variety of image formats including JPG, PNG, BMP, and GIF. And guess what? You can upload your own images too!

I get commissions for purchases made through some of the links in this post. There is no extra cost to you. See my full disclosure here.
Don’t have time to read the whole post? Scroll down to watch the short video!
The Magic of Cricut Design Space
Cricut Design Space is a cloud-based software that pairs perfectly with your Cricut cutting machine. It’s your go-to platform for creating and editing designs, and even uploading your own images and fonts. The iOS app version brings all this functionality right to your fingertips, letting you design on the go.
9 Easy Steps to Upload Images to Cricut on Your iPad
In the world of crafting and design, technology is a game-changer. It provides tools that make the process more efficient, enjoyable and of course, my favorite, super simpe!
Cricut Design Space iOS App is a perfect example of this. Let’s jump into the steps to upload a png, jpg, or svg file to the app.
- Open the App: Once you open the app, go to the “Upload” button. If you don’t see the new “Upload” button on your app, then you need to update your Cricut Design Space app. You might need to delete the current app and download the updated version from the App Store.

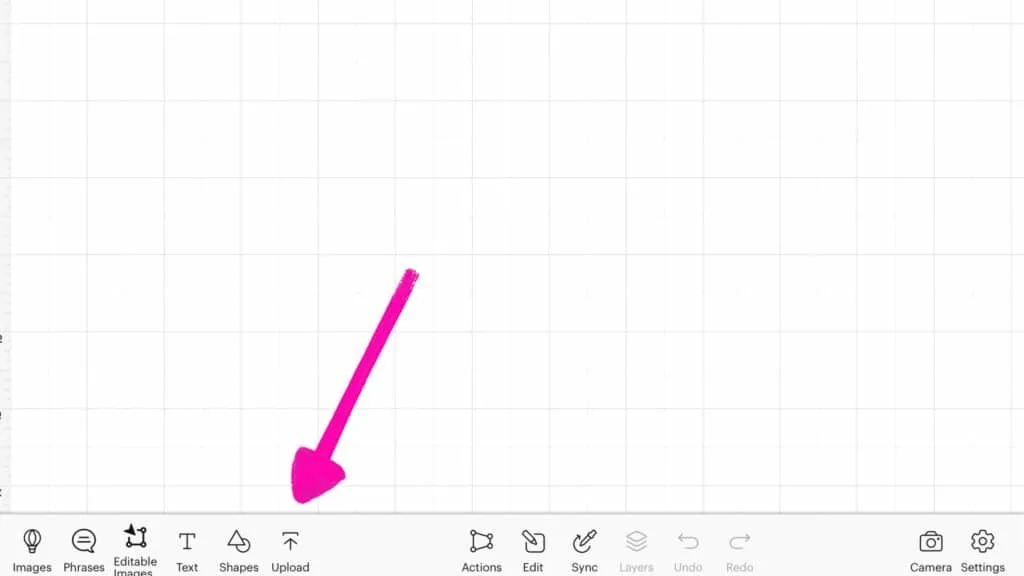
- Upload an Image: Tap on the “Upload” button. You have four options: take a photo, select from photo library, browse files, or open previously uploaded images.

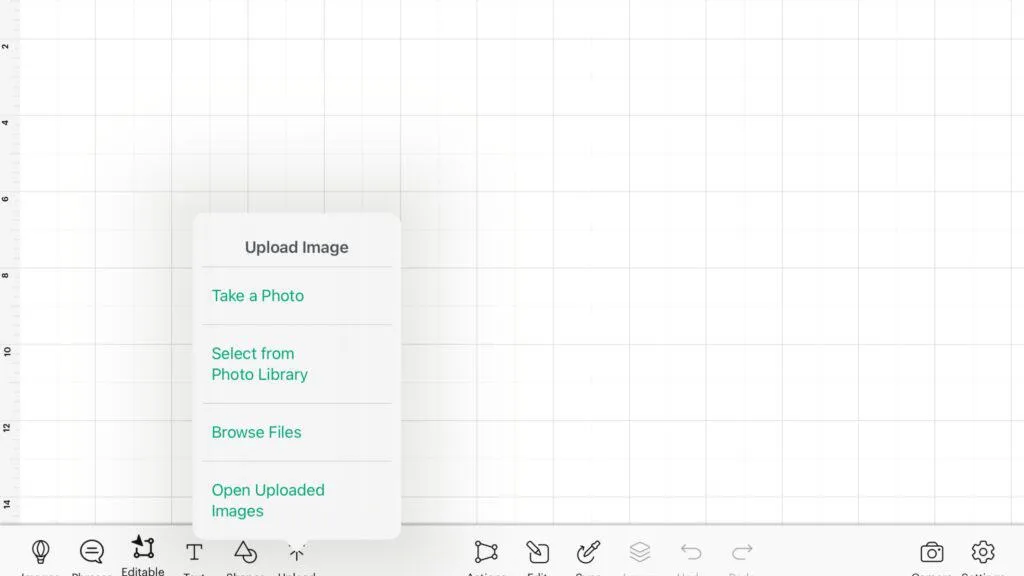
- Take a Photo: You can use your device’s camera to snap a photo of the image you want to upload. After taking the photo, you can use it directly in the app.
- Select from Photo Library: You can choose an image from your device’s camera roll.
- Browse Files: Select the file type that you want to upload from your saved files. The new upload feature works with JPG, PNG, BMP, GIF and SVG files.

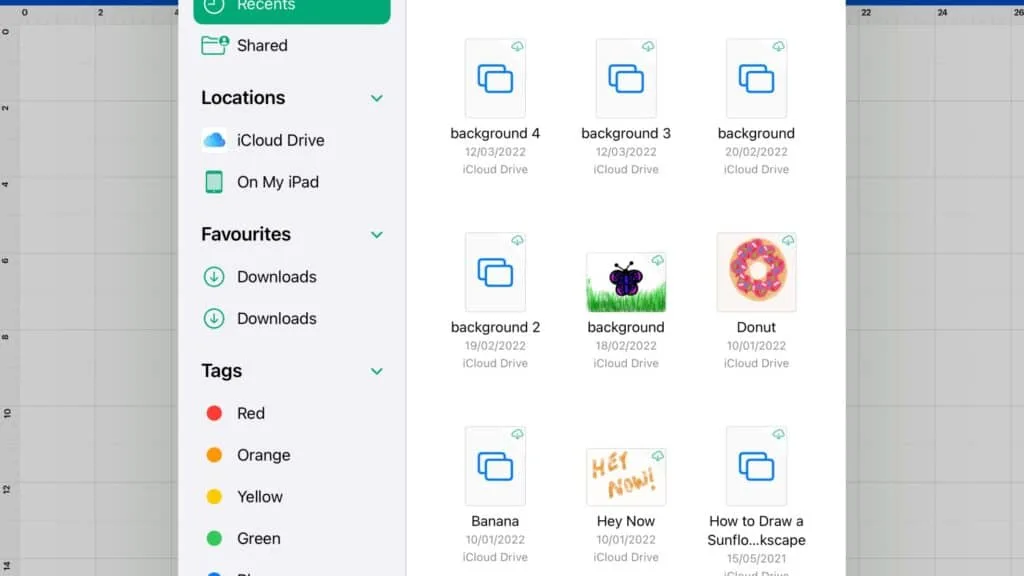
- Open Previously Uploaded Images: You can also open images that you’ve previously uploaded to the app.
- Edit the Image: After uploading the image, you can edit it within the app. You can crop the image, remove unwanted parts, remove the background, and adjust the image to your liking.

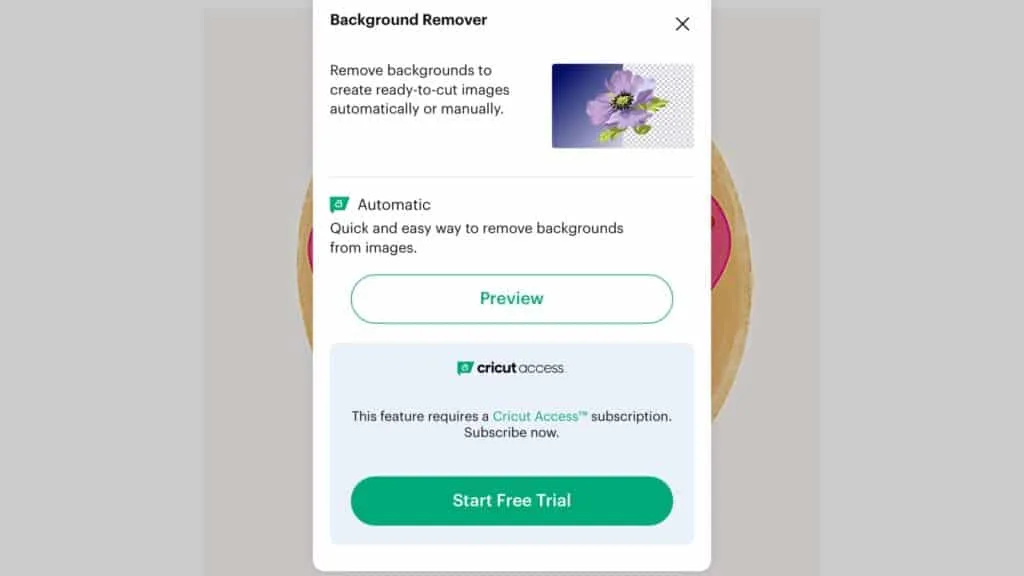
- Save the Image: Once you’re satisfied with your edits, tap “Next”. You can then name your image and choose whether you want it to be a cut image or a print and cut image. After saving, the image will appear in your uploaded images and you can insert it into your project.

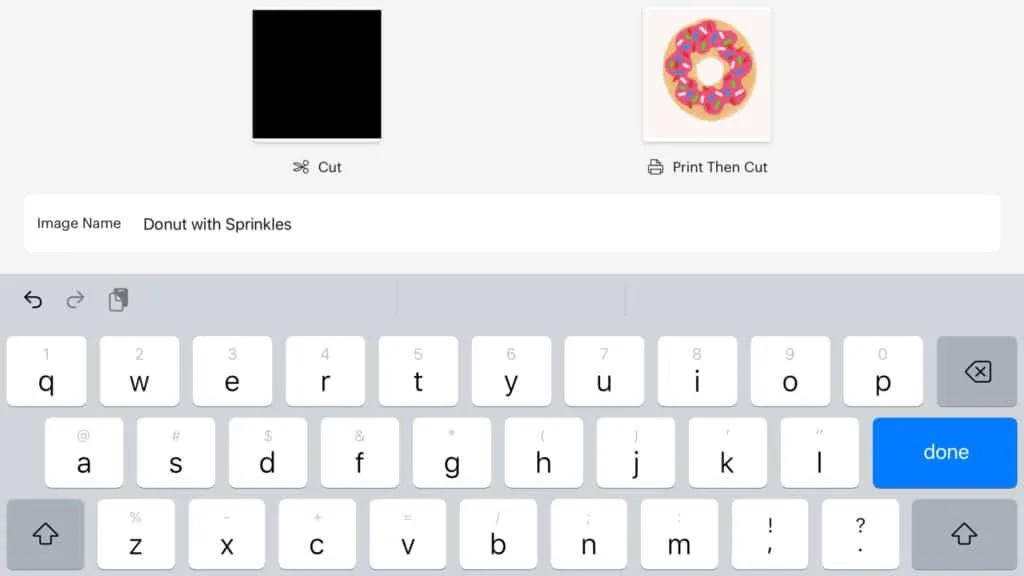
- Use the Image: The uploaded image is now ready to be used in your projects. You can cut it out in vinyl or use it in any other way you want.


Pro Tip: If you don’t see the new “Upload” button on your app, it’s time to update your Cricut Design Space app.


Conclusion
The Cricut Design Space iOS App is a powerful tool for crafters and designers.
So whether you’re at home in front of your computer or in the carpool line, you have the flexibility to create unique designs from anywhere.
Cricut has made it really easy to use Design Space for everyone. You can use free images, purchase images from Cricut Access, or upload your own files.
And the best part? You can switch back and forth between your iPad and your computer! That’s right, you can upload images to Cricut right from your desktop or laptop.
Now wasn’t that easy!?
9 Steps to Upload Images to Cricut Design Space on iPad


Learn how to upload images to the Cricut app on iPad in nine easy steps.
Materials
- Image file (PNG, JPG, DXF or SVG File)
Tools
- Cricut Design Space
- Cricut Access
- Canva
Instructions
- Open the Cricut Design Space App from the App Store on your iPad
- Select the File Type
- Upload an Image
- Take a Photo
- Select an image from the Photo Library
- Open Previously Uploaded Images
- Edit the Image by Removing the Background with Cricut Access or Canva
- Rename and Save the Image
- Use the Image to Make a Project
Notes
If the "Upload" button isn't visible, you may need to delete and reinstall the app from the App Store.
Recommended Products
As an Amazon Associate and member of other affiliate programs, I earn from qualifying purchases.


FAQs
You can upload photos to the Cricut Design Space app by clicking on the “Upload” button. You can then choose to take a photo, select a picture from your camera roll, or open previously uploaded images.
You can upload patterns to Cricut Design Space on your iPad by selecting the “Upload” button in the app. You can then choose your pattern file from your device’s storage.
To upload SVG files directly to the Cricut Design Space iOS app, click on the upload button, browse the files on your iPad, select the svg and save it.
Yes, it’s possible to save an image as an SVG file on an iPad. You can use a graphic design app like Adobe Illustrator, Inkscape, or a free online converter to convert your image to SVG format.
