
3 Steps to Load a Cricut Mat Like a Pro! Easy for Beginners
We all know that in the fantastic universe of crafting, getting our cuts just right is super crucial. That’s where our trusty sidekick – the Cricut machine – swoops in to save the day.
But, the real hero of the story? The Cricut mat! Believe me when I say, loading it up just right can really make or break your project.
The Cricut mat is nothing less than a superhero when it comes to crafting. If it’s not in its rightful place, the finished craft may just not live up to its potential.
To help it save the day, we have to understand the superpowers it comes with.
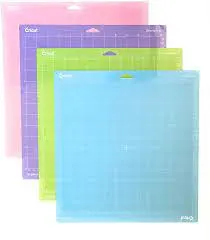
It’s got this handy arrow that tells you where to go, an outer grid line that’s got the measurements in both centimeters and inches (talk about bilingual, huh?), and an inner line that I’ve made my go-to for loading up the mat.


I get commissions for purchases made through some of the links in this post. There is no extra cost to you. See my full disclosure here.
How to Load Your Cricut Mat
So, let’s get right into it. To load up the mat like a pro, you gotta align your paper just right with the upper left-hand corner of the mat. Give it a little pull, slide it right back in until it hits the inner line, and voila!
Then, don’t forget to smooth out the paper. It’s gotta stick to the mat like they’re best friends, you know?
Remember, the better they get along, the less likely they are to create a ruckus in the form of inaccurate cuts or even potential damage.
If your Cricut cutting mats have lost their stickiness here are tips to get sticky mats again.

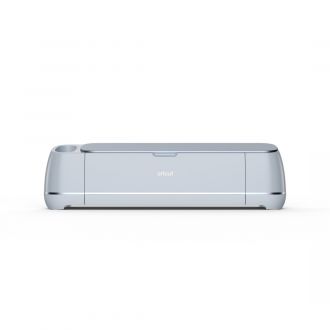
Alright, moving on. Let’s talk a bit about the Cricut machine itself. We’ve got the load/unload button (pretty straightforward, right?), the Cricut “C” or cut button (our main player here), and the pause button (our little breather).
A piece of advice from me to you – don’t rush that pause button. Give it a moment. It’s not a fan of rapid presses.
Now, let’s bring our mat and machine together. Remember, this part is like the big dance number – everything has to be in sync. Slide the mat under the machine guides and press it flat against the roller bar.
This will help us avoid any drama with the star wheels. Lightly press the load/unload button, and as soon as the machine starts to pull, just let it do its thing.
So, you’ve done the hard part, and now it’s time to see if your mat is all set. If it’s loaded correctly, your paper will peek at you from behind the machine.
Oh, and those flashing lights on the machine? They’re just letting you know that it’s ready to start cutting. And once your project is complete, the unload button will blink at you, giving you the green signal to remove the mat.
3 Steps to Load a Cricut Mat


Here are 3 quick steps to load your cutting mat onto the Cricut machine.
Materials
- Cricut mat
Tools
- Cricut cutting machine
Instructions
- Align your paper to the upper left-hand corner of the mat
- Gently pull back the mat
- Slide the mat back in until it touches the inner line
Notes
A gentle push and pull is all you need. Don't try to jam it in there.
Recommended Products
As an Amazon Associate and member of other affiliate programs, I earn from qualifying purchases.

Picking the Right Cricut Mat – The Best Way to Start
The first step to creating awesome crafts with your Cricut Maker is arranging your Cricut mat.
Depending on your project, you may need to use different mats.
For instance, if you’re working with heavy cardstock or adhesive vinyl, a standard grip mat (green mat) is a great option. On the other hand, for glitter cardstock, a purple mat (StrongGrip Mat) is recommended.
Practicing on your Cutting Mats
Test out a wide range of medium-weight materials on the standardgrip mat. Try using cardstock to test out your cuts before moving on to more expensive material.
Aligning Paper on Your Cricut Mat – Precision Matters
The best way to align your paper on the Cricut mat is to line it up to the upper left-hand corner of the adhesive surface.
Use the grid lines on your mat to ensure your paper is straight and positioned correctly. This becomes even more crucial when working on intricate designs where precision is key.
Troubleshooting – Why is my Cricut Mat not Loading Properly?
There might be a few reasons why your Cricut mat is not loading correctly.
Before you run out and buy all new mats, the first thing to do is to check if the edges of your mat are clean.
If they’re dirty, use a lint roller to get rid of the first layer of dust and then warm water to quickly clean it up. My easy go-to cleaner is Awesome Spray. It’s a one-step degreaser that cleans your mats well.


You can also try using alcohol-free baby wipes or a wet wipe in a circular motion to clean the entire surface of the mat. Another common issue could be misalignment.
Always ensure your mat is pushed up against the roller bar before pressing the load/unload button. If you’re still facing issues, try a different mat.
If the problem persists, it might be time to reach out to Cricut’s customer service.
The Correct Orientation of Cricut Paper
When loading your paper onto the Cricut mat, the paper should be placed face up, with the top of the paper aligned to the top of the mat.
Remember to align the paper with the grid lines to ensure precision.
Which End of the Cricut Mat Goes in First?
The end with the arrow should go into the Cricut Maker first. Make sure the arrow is pointing toward the machine. This way, the mat can properly align with the roller bar in the machine.
Vinyl Loading – Up or Down on the Mat?
When working with vinyl, the vinyl should be placed face up (or the sticky side down) on the mat.
This is important as the Cricut Maker cuts the design into the vinyl but not through the backing paper, making it easier to transfer your design later.
If you’re using Smart Vinyl with a Cricut Joy, you can cut without a mat.
Conclusion
Follow these steps, and you’ll be loading your Cricut mat like a pro in no time. Here’s to perfect cuts and incredible crafts.
For more tips and tricks about svg files and Cricut Design Space, check out my YouTube channel or join my Facebook group.
Don’t forget to share your finished projects on social media! You might just inspire others with your ingenious Cricut hacks.
Remember, taking good care of your mats can extend their life, allowing you to create great crafts from your first project to more fun layered projects.
Want more insider tips? Learn how to get Cricut to stop charging you for designs.
