
Connect Cursive Letters on Cricut DS in Less than 5 Minutes
Connecting cursive fonts in Cricut is easy to do if you know this simple one-step process. This tip will save you hours of headaches if you are struggling to put together individual letters into a single shape.
In this post, I’ll show you how you can join script fonts all together in Cricut design space software, all in less than 5 minutes.
Here’s what you’ll need.
Tools and Optional Supplies
Tools
Cricut Design Space
Fonts (these can be free fonts, Cricut fonts, or your own computer system fonts)
Optional Supplies




I get commissions for purchases made through some of the links in this post. There is no extra cost to you. See my full disclosure here.
Different Ways to Connect Cursive Font
Cursive letters are beautiful and that’s why you see them everywhere in so many craft projects. But, it can be a real pain to work with them if you don’t know how to connect them to make one single word.
Of course, there are several ways to go about joining them together.
Letter Space
You can try using the letter line spacing tool to bring the letters closer together. This doesn’t give the greatest results because it just treats each individual letter the same. Meaning that it will move each letter at an equal amount of distance. The problem with this is that it can give kerned fonts a distorted look.


Weld Tool
The best way to connect cursive letters is by using the weld feature.
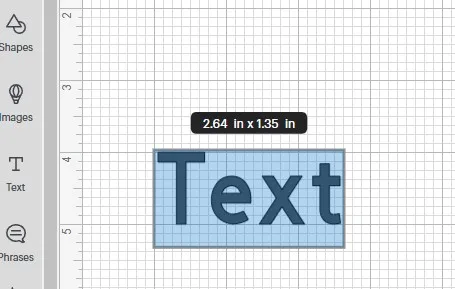
The first thing you want to do is open up Cricut Design Space. Once you have your new canvas open, use the text feature to type out a word.

Change Fonts in Cricut
You can change the default font by using the font tool at the top menu bar. Cricut gives you the option to use new fonts from Cricut Access or the fonts that you already have saved in your computer.


I’ll choose BFC Ballgame from the selection of Cricut fonts (you can get it in Cricut Access) and write the word “Forever”


The letter F in the word has a space between it and the next letter “o”. I want them joined together. I’ll delete the letter F and open up a new text box. In this text box, I’ll type out the letter “F”.


Join Cursive Text
Now I can simply click and drag over all of the letters to select them. Or you can use the select all button at the top of the screen, if you only have the letters on your canvas.
At this point it may look like the words are connected but you can see the overlapping cut lines between the F and the rest of the word.


With the letters selected, I’ll click on the combine button and select weld.
Now you can see that the whole word is connected in a single layer in the layers menu.


How to Connect Cursive Letters in Cricut


Materials
- Cricut Design Space
- Fonts
Tools
- Cricut Access
- Cricut machine
Instructions
- Click on New to open up a new canvas in Cricut Design Space.
- Next, click on the text tool and a text box will appear on the canvas
- Double click to write the text that you want
- Select Font from the top of Cricut Design Space
- Choose from either Cricut fonts, system fonts or bookmarks
- Right click to copy and paste the word
- Delete the separated letter(s) or rewrite the letters you want
- Repeat the last step if necessary
- Select all the letters
- Click on the weld button
- All of the letters in the entire word are now connected
- The different layers are now one weld result in the layers panel
Notes
The fonts you use can be free fonts, Cricut fonts, or your own computer system fonts.
Recommended Products
As an Amazon Associate and member of other affiliate programs, I earn from qualifying purchases.


Use the weld feature to merge letters in Cricut.
Cursive letters don’t have to connect. You are free to make them as separate letters but the look and feel will be off.
Need more time to finish the post?
Want to save this for later? Pin it to your favorite Cricut tips board on Pinterest!
More creative craft ideas!
If you loved this tip, I hope you will try my other easy DIY craft ideas! Now that you know how to join cursive script letters,see what you need to make custom t-shirts on your Cricut or funny svg files that you can sell with your new craft business from home.
Conclusion
It doesn’t take much time at all to connect letters in Cricut. The weld tool is a great way to do this.
Whether you use a fancy script font or basic script text, you can turn it into one continuous word that’s easy to cut on your Cricut machine.
