Looking to add some flair to your Easter celebrations? Check out these creative egg decorating ideas that can turn plain shells into stunning works of art.
Whether you’re into classic pastel shades or bold, funky patterns, there’s something here for every style and skill level. Grab your supplies and let your creativity shine!
Pastel Watercolor Technique


Try out the pastel watercolor technique for a fun twist on egg decorating! Use soft colors that blend beautifully for a dreamy, artistic look.
This method is perfect for creating unique designs that stand out in any Easter basket.
Natural Dye from Vegetables
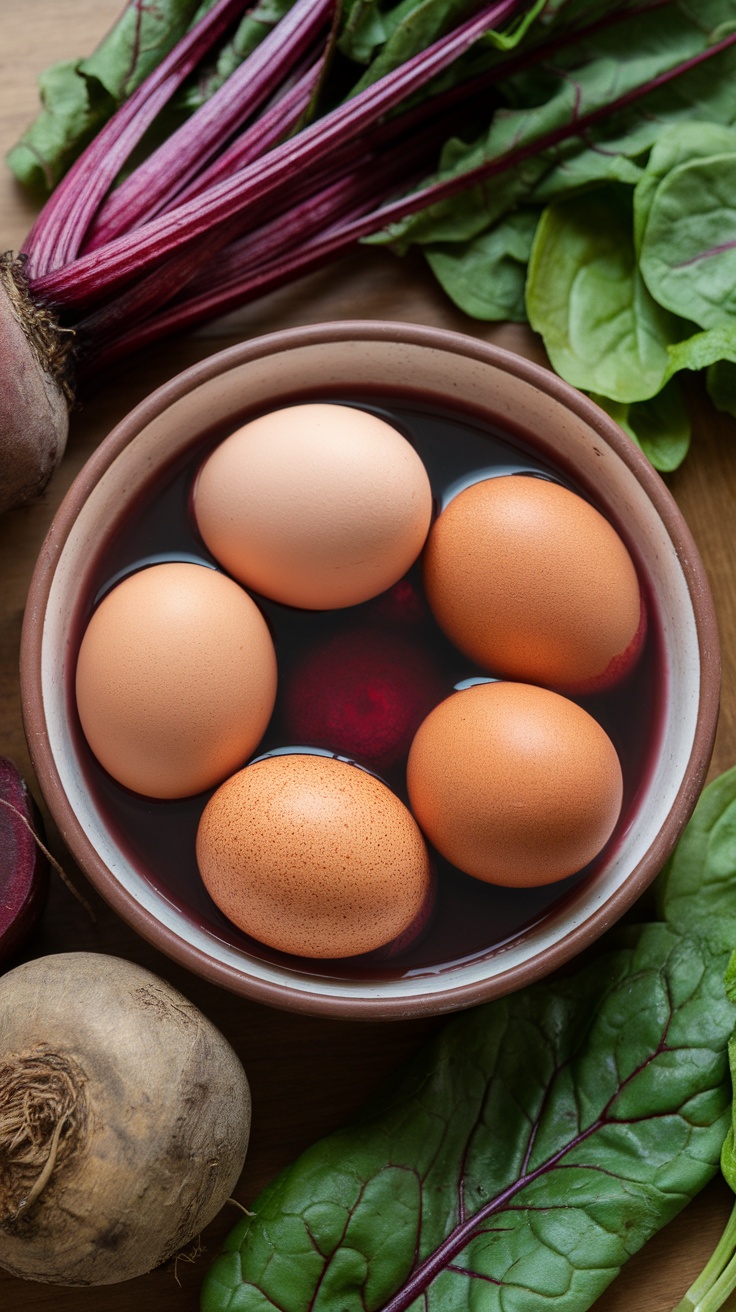
Using vegetables to dye your Easter eggs is a fun and eco-friendly idea. For vibrant colors, try beets for red, spinach for green, and onion skins for a lovely yellow.
Simply boil the veggies in water, add your eggs, and let them soak for a beautiful, natural finish!


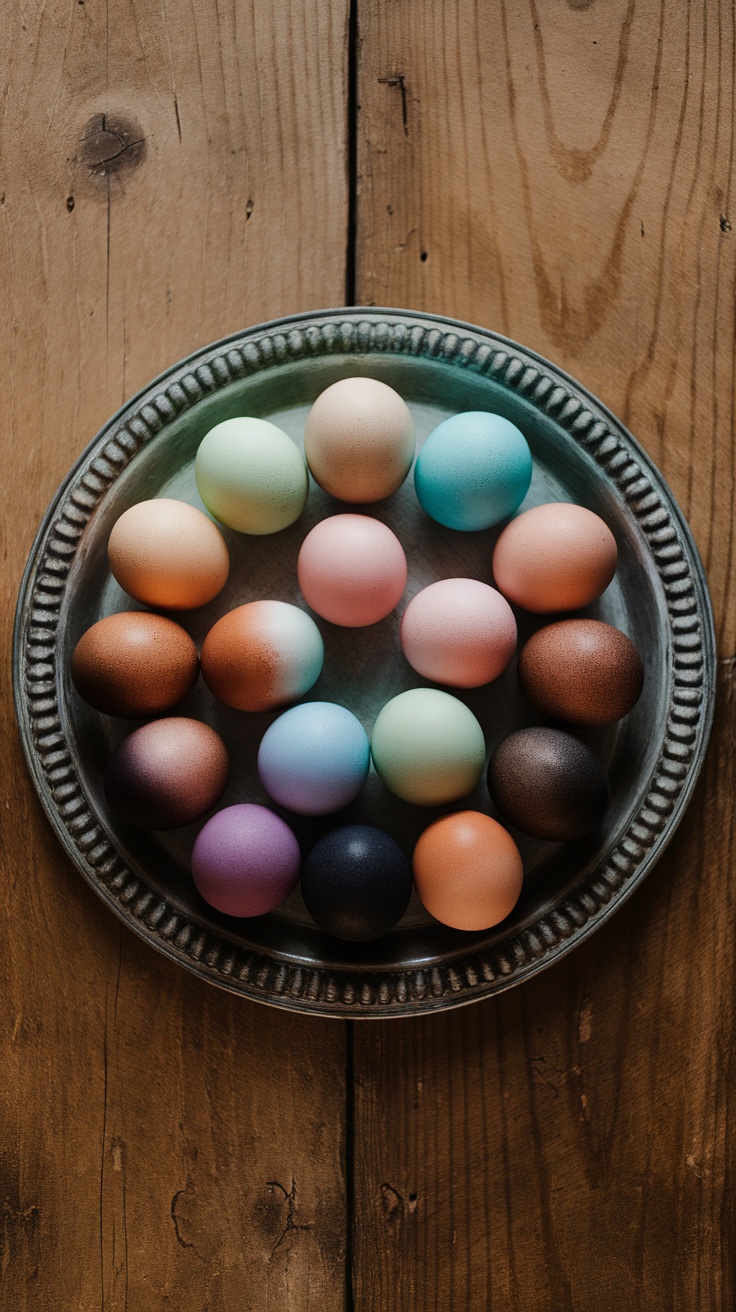
How to Make Red Cabbage and Blueberry-Dyed Easter Eggs
These naturally dyed eggs create beautiful, earthy tones, making them a fun and eco-friendly Easter project. Follow the steps below to create stunning designs:
Materials Needed:
- White or brown hard-boiled eggs
- 1/2 head of red cabbage
- 1 cup of blueberries
- 2 medium pots
- Water
- 2 tablespoons of white vinegar
- Strainer or cheesecloth
- Bowls for dyeing
- Gloves (optional, to avoid staining hands)
- Paper towels or drying rack
Instructions:
Step 1: Prepare the Red Cabbage Dye
- Chop the red cabbage into small pieces.
- Place the chopped cabbage in a pot and add enough water to cover it (about 4-5 cups).
- Bring the water to a boil, then reduce to a simmer for 30 minutes.
- Strain the liquid into a bowl, discarding the cabbage solids.
- Stir in 1 tablespoon of white vinegar to intensify the color.
Step 2: Prepare the Blueberry Dye
- In another pot, combine 1 cup of blueberries with 3 cups of water.
- Bring the mixture to a boil, then simmer for 20-25 minutes.
- Mash the blueberries gently with a spoon to release more pigment.
- Strain the liquid into a separate bowl, discarding the blueberry solids.
- Add 1 tablespoon of white vinegar to the liquid.
Step 3: Dye the Eggs
- Place your hard-boiled eggs into each bowl of dye. Ensure the eggs are fully submerged.
- For lighter tones, soak the eggs for 30-60 minutes. For deeper colors, leave them in the dye for 4-8 hours or overnight in the refrigerator.
- If desired, create patterns by wrapping the eggs with rubber bands, leaves, or onion skins before dyeing.
Step 4: Remove and Dry
- Use a spoon to carefully remove the eggs from the dye.
- Let them air dry on a rack or paper towels.
- Once dry, gently polish the eggs with a little vegetable oil for a shiny finish.
These natural dyes not only produce gorgeous hues but also give your Easter eggs a unique and sophisticated look. Add this craft to your Easter traditions for a creative and natural spin!
Marbleized Effect Using Shaving Cream
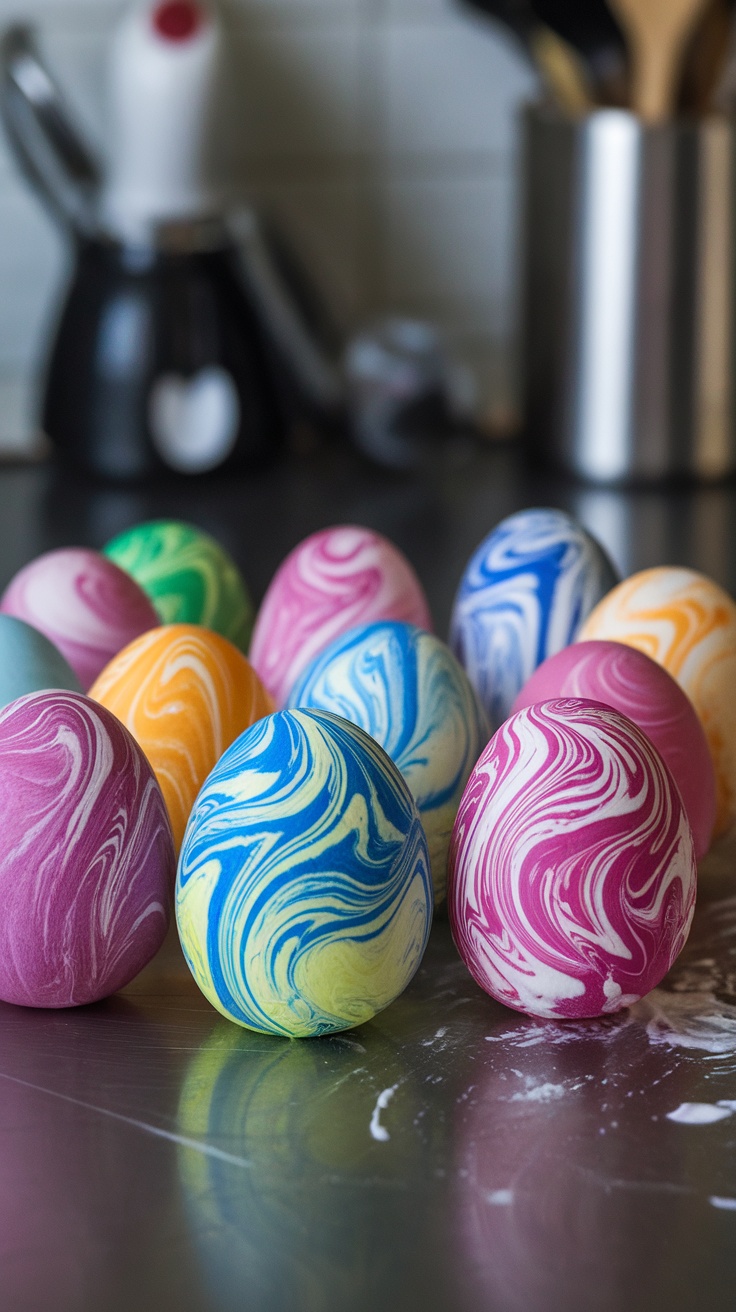
Creating a marbleized effect on your Easter eggs is super fun and easy! Just mix food coloring into shaving cream, dip your eggs, and watch the magic happen.
The swirls and colors will make your eggs stand out this Easter!
Ombre Style Eggs
Ombre style eggs are a fun way to play with colors this Easter. Start with a light base and gradually dip the egg into darker shades for a smooth transition.
This simple technique creates a beautiful gradient effect that will impress everyone!
Glitter and Glam Eggs
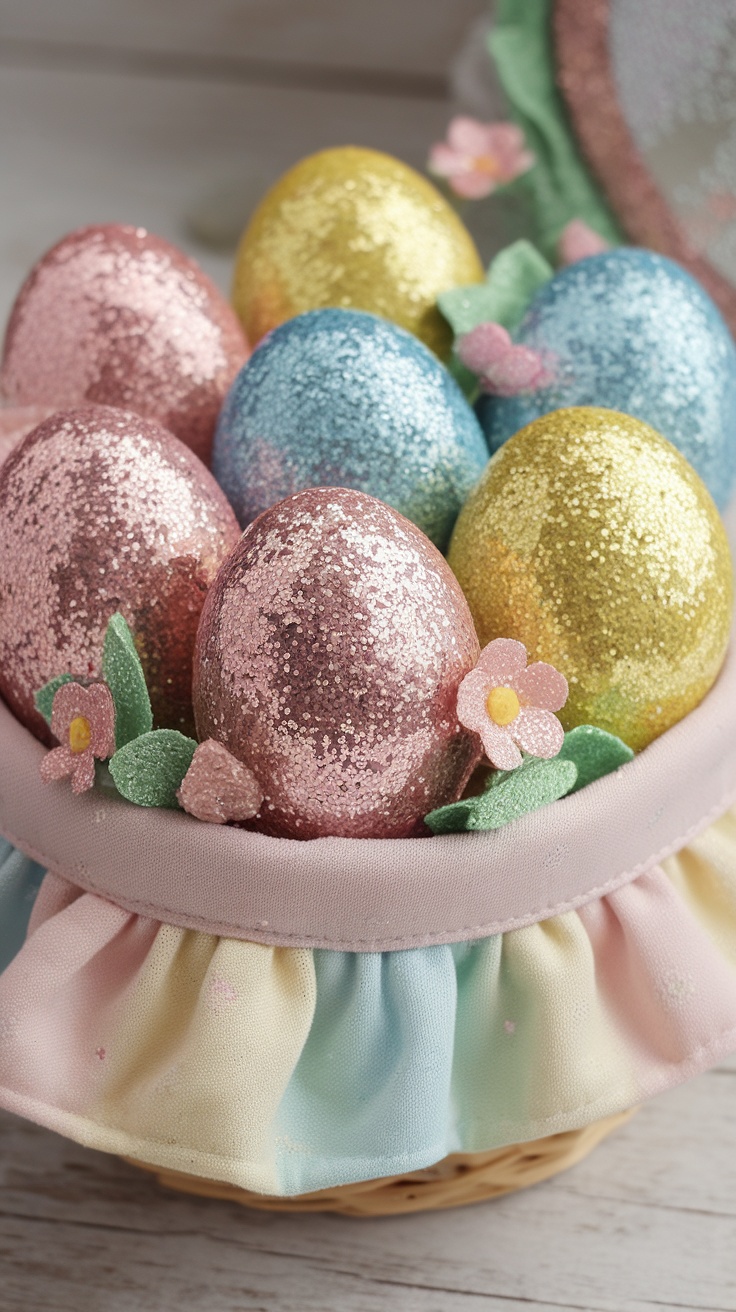
Get ready to add some sparkle to your Easter decor with glitter eggs! Simply coat hard-boiled or plastic eggs with glue and sprinkle on your favorite glitter colors.
Pair them with cute flowers and greenery for a cheerful display that shines bright!
How to Make Glitter Easter Eggs
Want to add some sparkle to your Easter decorations? Glitter Easter eggs are the perfect glamorous touch, and they’re surprisingly easy to make. Follow these steps to create your own shimmering eggs.
Materials Needed:
- Hard-boiled or plastic eggs
- Craft glue or Mod Podge
- Fine glitter in various colors
- Small paintbrush
- A shallow bowl or plate
- Wax paper or parchment paper
- Optional: Sealant spray (to prevent glitter fallout)
Instructions:
Step 1: Prepare Your Workspace
- Lay wax paper or parchment paper on your work surface to catch excess glitter.
- Pour your glitter into shallow bowls or plates for easy application.
Step 2: Apply the Glue
- Using a small paintbrush, coat an egg evenly with a thin layer of craft glue or Mod Podge.
- If you want to create patterns, use the brush to apply glue in specific areas or designs (e.g., stripes, polka dots).
Step 3: Add the Glitter
- Hold the egg over your bowl of glitter.
- Sprinkle glitter generously over the glued areas, ensuring full coverage.
- Gently tap the egg to remove any excess glitter.
Step 4: Let Them Dry
- Place the glitter-covered eggs on wax paper to dry completely. This usually takes about 1-2 hours.
- If desired, repeat the process for additional layers of glitter for a more vibrant look.
Step 5: Seal the Glitter (Optional)
- Once the eggs are dry, spray them lightly with a sealant to keep the glitter from rubbing off.
- Let the eggs sit for another 30 minutes to dry.
Tips:
- Mix glitter colors for a unique, multi-tonal effect.
- Use pastel-colored glues or dyes as a base coat for a fun pop of color under the glitter.
- Combine these glitter eggs with natural-dyed eggs for a balanced mix of styles in your Easter basket.
These glitter eggs are perfect for centerpieces, Easter egg hunts, or just adding a bit of sparkle to your holiday décor!
Floral Decoupage Eggs
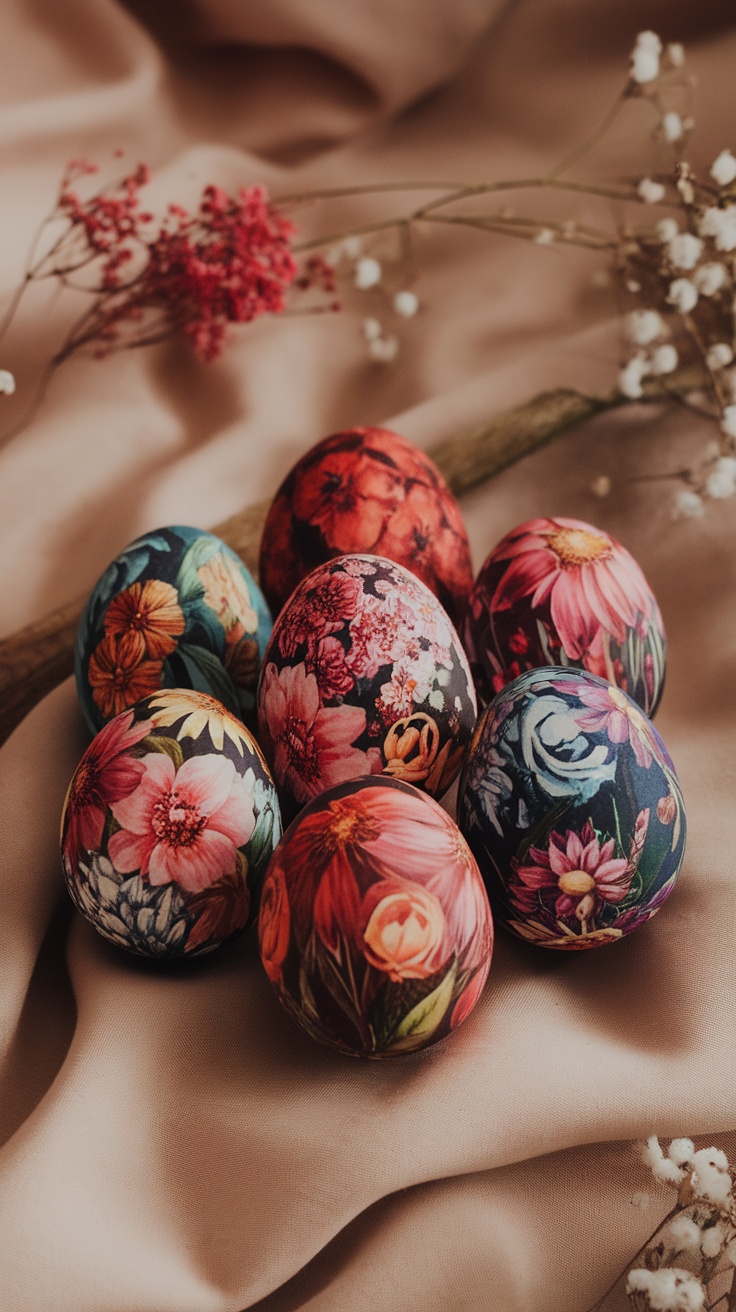
Floral decoupage eggs are a fun and beautiful way to decorate for Easter. Use colorful floral images to transform plain eggs into stunning pieces of art. This simple technique lets your creativity shine while adding a fresh touch to your holiday decor.
Stenciled Patterns with Tape
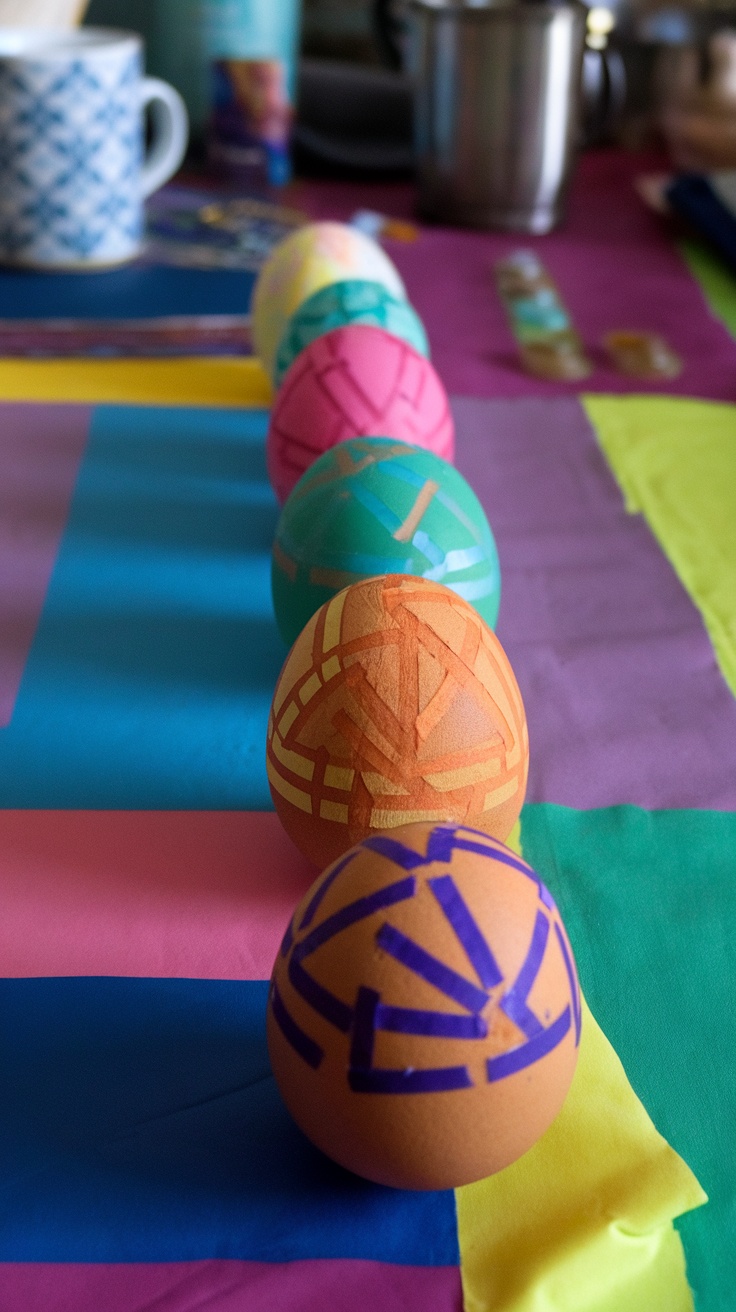
Stenciling your Easter eggs with tape is super fun and easy! Just use strips of tape to create cool patterns on the eggs before dyeing them. When you peel the tape off, you’ll reveal some awesome designs that are sure to impress!
Animal Print Inspired Eggs
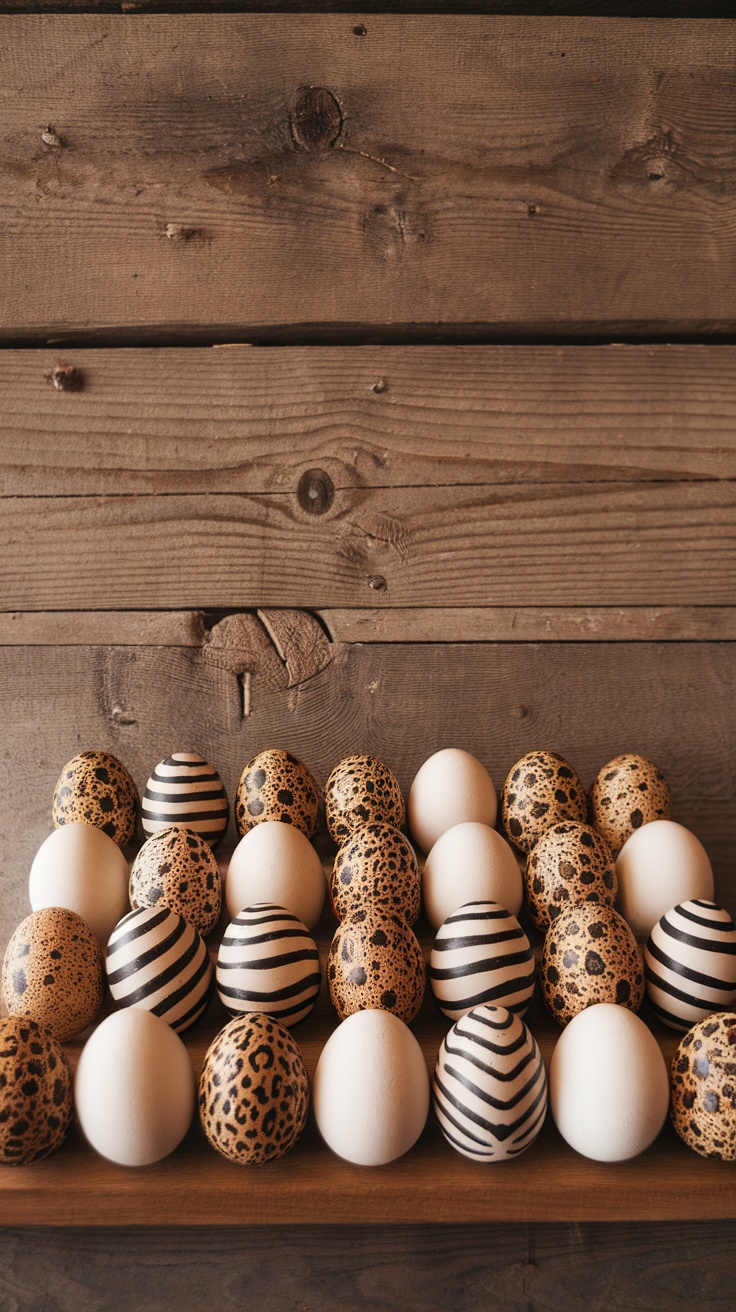
Animal print inspired eggs are a fun twist for your Easter decorating. You can mix and match patterns like leopard spots and zebra stripes for a wild look. This unique idea will surely make your Easter display stand out!
Chalkboard Paint Eggs
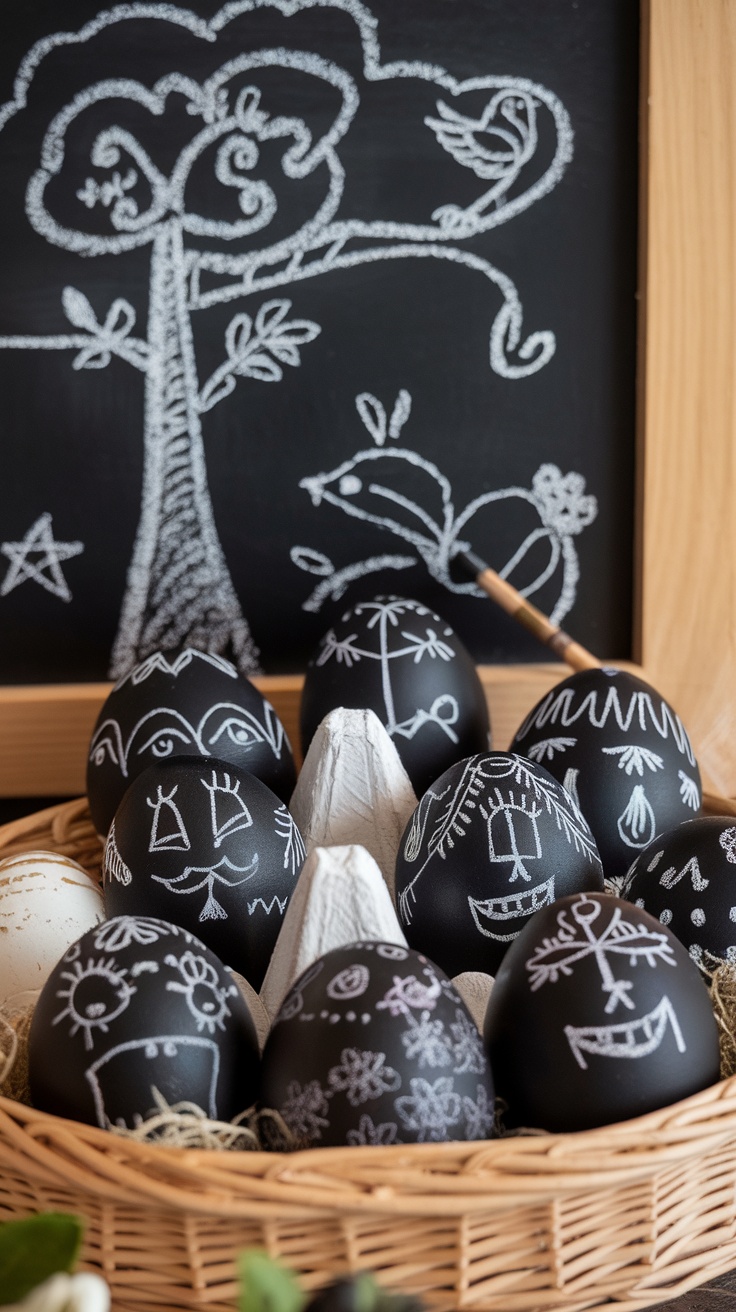
Chalkboard paint eggs are a fun twist on traditional decorating. You can draw anything you like, from silly faces to intricate designs. Plus, when you want a change, just wipe it clean and start over!
Try making a matching Easter door hanger to complete the look.
Interactive Egg Hunt Decor
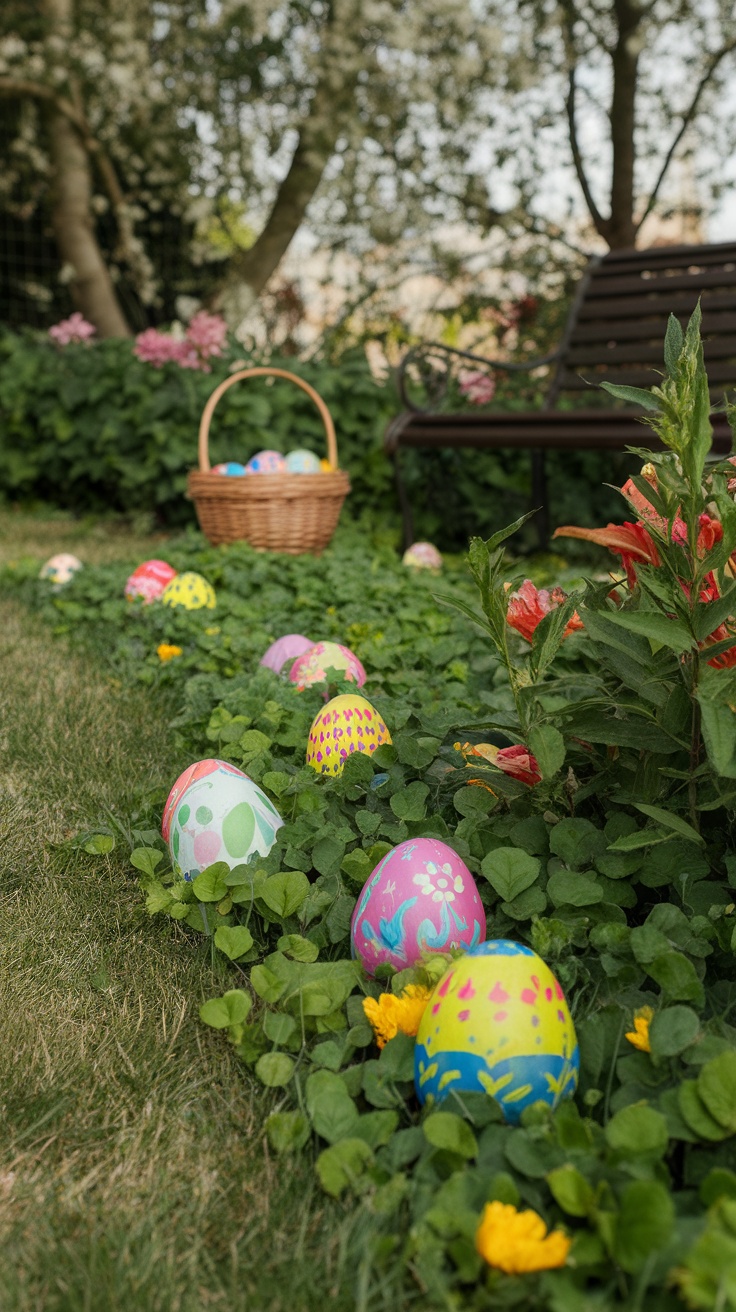
Colorful eggs scattered in your garden can make an egg hunt really fun! Use vibrant designs to spark excitement and make each find a little surprise. Adding a basket nearby gives kids a perfect spot to gather their treasures.


