DIY felt ornaments are a fun and creative way to add a personal touch to your holiday decor. With just a few supplies, you can craft unique and colorful pieces that stand out on your tree or make great gifts.
Whether you’re a beginner or have some experience, this is a simple and enjoyable project that lets your imagination shine!
Creating a Festive Snowman Ornament
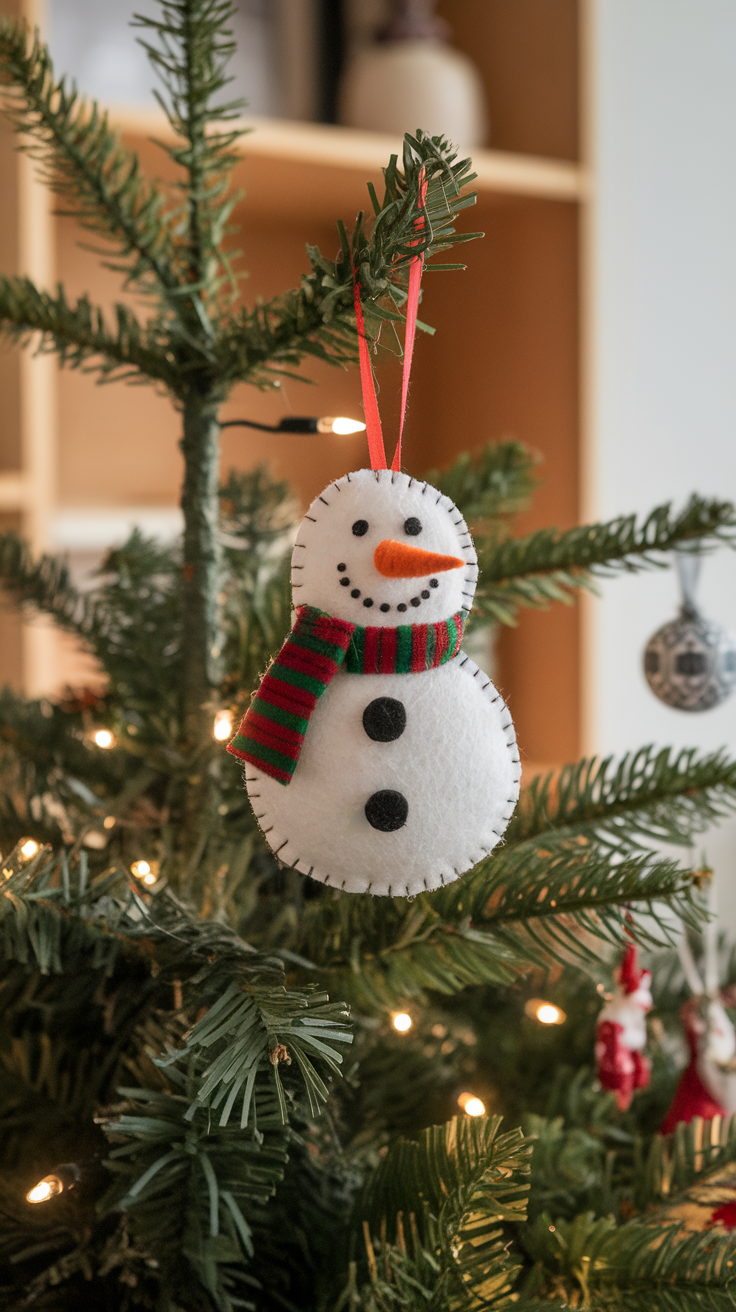
1. Felt Snowman Ornament
This adorable snowman felt ornament will bring charm to your tree or gifts. With just a few simple stitches and easy-to-find supplies, you can create this festive little buddy in no time.
Supplies:
- White felt (for the snowman’s body)
- Black felt (for buttons and eyes)
- Orange felt (for the carrot nose)
- Red and green striped fabric or felt (for the scarf)
- Black embroidery thread (for the mouth)
- Red ribbon (for hanging)
- Needle and black/white thread
- Fabric glue or hot glue (optional)
- Scissors
- Polyester stuffing
How to Make It:
- Cut the Pieces: Draw and cut out two identical snowman shapes from the white felt. Also, cut:
- 2 small black circles for eyes,
- 2 larger black circles for buttons,
- 1 small carrot shape from orange felt for the nose,
- A scarf shape from red and green fabric/felt.
- Stitch the Face: Take one of the snowman shapes and sew on the eyes, nose, and stitch a smile using black embroidery thread.
- Add the Buttons: Below the face, sew or glue the two black circles for buttons.
- Assemble the Snowman: Place the two white felt pieces together. Using a blanket stitch or running stitch, sew around the edge of the snowman, leaving a small opening for stuffing.
- Stuff and Finish: Gently fill the snowman with polyester stuffing to give it a plump look. Sew the opening shut.
- Attach the Scarf and Ribbon: Wrap and glue or stitch the scarf around the snowman’s neck. Loop a red ribbon through the top of the head and secure it for hanging.
Your handmade snowman is ready to add a cozy winter vibe to your holiday decor!
Hang it up and enjoy the smiles it brings!
Adorable Animal-Themed Felt Ornaments
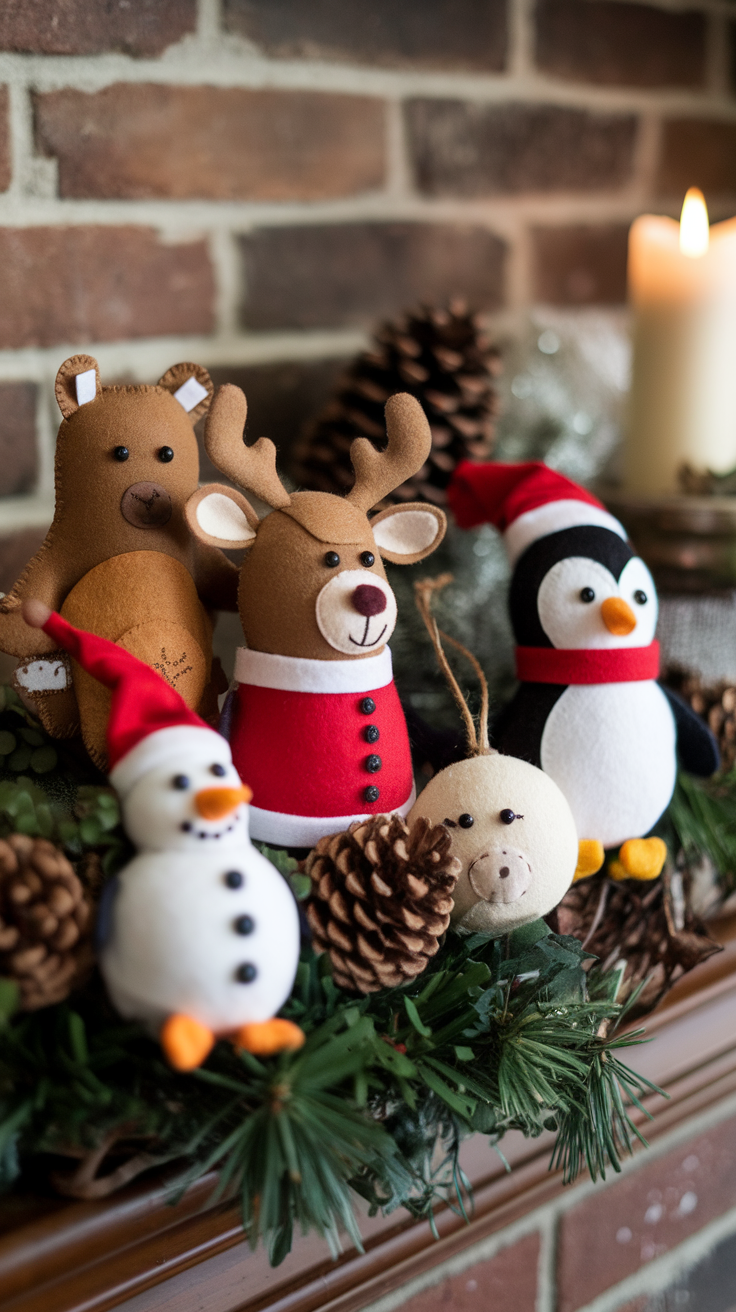
2. Felt Reindeer Ornament
This festive felt reindeer is perfect for adding some holiday magic to your tree or mantle. With its adorable antlers and cozy Santa coat, it’s a must-make for any crafter looking for a charming touch.
Supplies:
- Light brown felt (for the reindeer body)
- Dark brown felt (for the antlers and nose)
- White felt (for the Santa collar)
- Red felt (for the coat)
- Small black beads or buttons (for eyes)
- Black embroidery thread (for mouth details)
- Polyester stuffing
- Needle and thread (in coordinating colors)
- Scissors
- Fabric glue or hot glue (optional)
How to Make It:
- Cut the Pieces: Draw and cut:
- 2 identical reindeer body shapes from light brown felt,
- 2 dark brown antlers,
- 1 dark brown nose,
- A red rectangle for the coat, and
- A thin white strip for the collar.
- Assemble the Face:
- Sew or glue the dark brown nose onto the center of one reindeer piece.
- Attach the black bead eyes above the nose.
- Use black embroidery thread to stitch a small smile.
- Attach the Antlers: Sandwich the dark brown antlers between the two body pieces at the top of the reindeer’s head. Pin in place.
- Stitch and Stuff:
- Sew the two reindeer body pieces together using a blanket or running stitch, leaving a small opening.
- Stuff the reindeer with polyester stuffing to give it a plush look.
- Sew the opening shut.
- Add the Coat and Collar: Wrap the red felt rectangle around the reindeer’s body, securing with stitches or glue. Attach the white felt collar at the top.
- Finishing Touch: Add a small loop of thread or ribbon to the top of the head for hanging.
This adorable reindeer will make a delightful addition to your Christmas tree or handmade holiday gifts!
Personalized Felt Name Ornaments
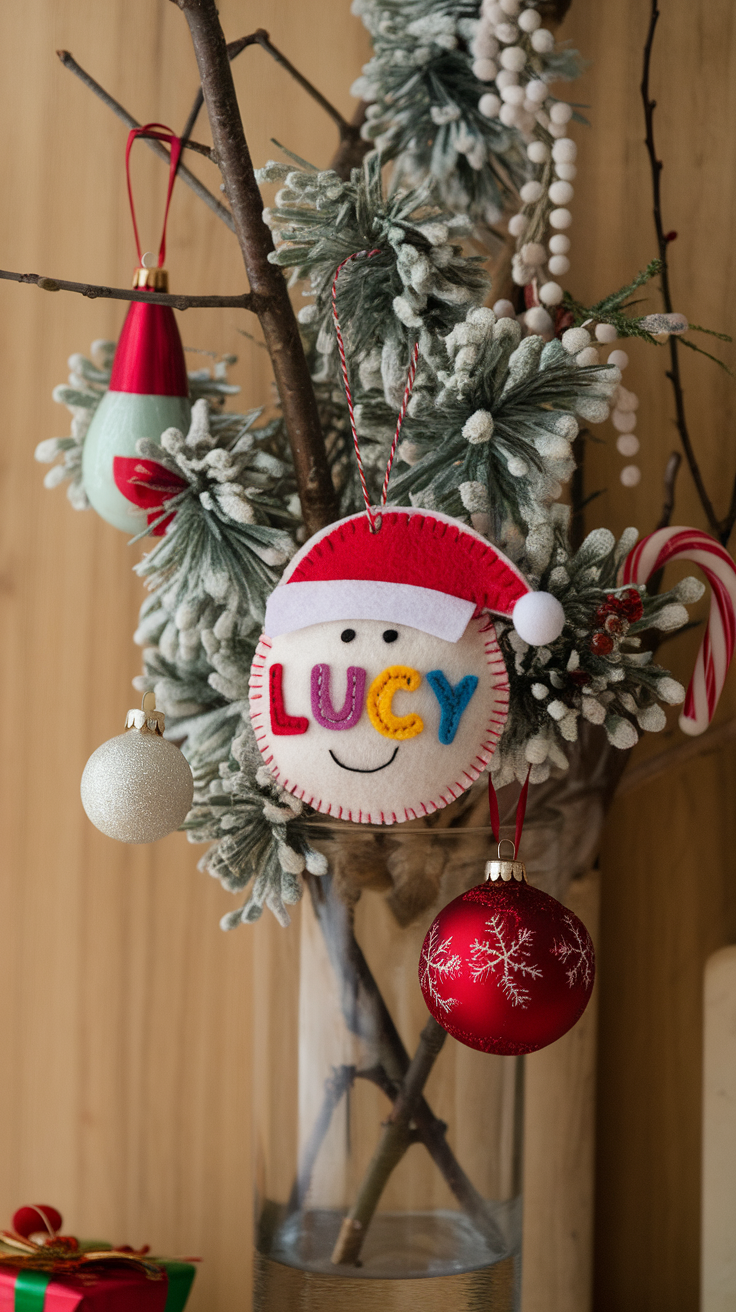
3. Personalized Felt Name Ornament
This cute and customizable name ornament is perfect for adding a personal touch to your holiday decor. Whether you’re making it for your kids, friends, or as a unique gift, it’s both charming and easy to craft!
Supplies:
- White felt (for the ornament base)
- Red felt (for the Santa hat)
- Small colorful felt pieces (for the letters)
- Black embroidery thread (for eyes and smile)
- Red and white string or ribbon (for hanging)
- White pom-pom (for the hat’s tip)
- Needle and thread (matching colors)
- Scissors
- Fabric glue (optional for letters)
- Polyester stuffing
How to Make It:
- Cut the Pieces:
- Cut two circles from the white felt for the ornament base.
- Cut a red Santa hat shape and a small white rectangle for the hat’s brim.
- Cut felt letters to spell the desired name in bright, colorful pieces.
- Assemble the Face and Hat:
- Stitch or glue the Santa hat to one of the white circles. Add the white brim and pom-pom at the tip of the hat.
- Below the hat, stitch two black eyes and a curved smile using black embroidery thread.
- Attach the Name:
- Arrange the colorful felt letters below the smile. Glue or stitch them onto the white felt base.
- Sew and Stuff:
- Place the two white felt circles together. Stitch around the edge using a blanket stitch, leaving a small opening.
- Stuff the ornament with polyester filling to give it a plump look.
- Sew the opening shut.
- Add the Hanging String:
- Loop a piece of red and white string or ribbon through the top of the ornament and secure it for hanging.
Your personalized ornament is now ready to shine on the tree or be given as a thoughtful handmade gift!
Personalized felt name ornaments add a fun touch to your holiday decor. These unique pieces can be made for everyone in the family, making them perfect gifts or keepsakes.
Each ornament brings a smile and a personal touch to your festive celebrations!
Crafting Felt Gingerbread Men Ornaments

4. Felt Gingerbread Man Ornament
This adorable gingerbread man ornament brings a classic holiday vibe to your decor without the mess of baking! With its cheerful face and “frosting” details, it’s a sweet and simple DIY project.
Supplies:
- Brown felt (for the gingerbread body)
- White embroidery thread (for frosting details)
- White felt or small beads (for the eyes)
- Green buttons or small felt circles (for the chest)
- Black embroidery thread (for the mouth)
- White ribbon (for hanging)
- Needle and thread
- Polyester stuffing
- Scissors
- Fabric glue (optional for buttons or details)
How to Make It:
- Cut the Gingerbread Shape:
- Draw and cut two identical gingerbread man shapes from the brown felt.
- Decorate the Front:
- Use white embroidery thread to stitch frosting details on the arms and legs in a zigzag pattern.
- Attach two small white felt circles or beads for the eyes.
- Stitch a cheerful smile with black embroidery thread.
- Sew or glue green buttons (or felt circles) down the center for added charm.
- Assemble the Ornament:
- Place the two gingerbread man shapes together. Using a blanket stitch or running stitch, sew around the edges, leaving a small opening.
- Stuff and Close:
- Fill the gingerbread man with polyester stuffing to give it a plush, three-dimensional look.
- Sew the opening shut.
- Add the Hanging Ribbon:
- Loop a white ribbon through the top of the gingerbread man’s head and secure it for hanging.
Your gingerbread man is ready to sweeten up your tree, wreaths, or gift tags this holiday season!
Making felt gingerbread men ornaments is a fun way to get into the holiday spirit. You can personalize each one with buttons and decorations to match your style.
Whimsical Felt Star Ornaments

5. Colorful Felt Star Ornaments
Brighten up your holiday decor with these whimsical felt star ornaments! Their cheerful colors and soft texture make them perfect for both Christmas trees and handmade garlands. Plus, they’re beginner-friendly and endlessly customizable.
Supplies:
- Assorted colorful felt sheets (for the stars)
- Embroidery thread (in matching or contrasting colors)
- Needle and thread
- Polyester stuffing
- Scissors
- Fabric chalk or a star template
- Ribbon or string (for hanging)
How to Make It:
- Cut the Star Shapes:
- Draw or trace a star template onto the colorful felt sheets. Cut two identical star shapes for each ornament.
- Pro tip: Use different colors for the front and back for a fun twist!
- Stitch the Details:
- With embroidery thread, stitch decorative lines on one star shape, starting from the center to each point. This creates a 3D effect.
- Use a simple running stitch or backstitch for clean, crisp lines.
- Assemble the Star:
- Place the two star shapes together. Use a blanket stitch or running stitch to sew around the edges, leaving one section open for stuffing.
- Stuff and Seal:
- Gently stuff the star with polyester filling to give it a plump look.
- Finish stitching the opening shut.
- Add the Hanging Loop:
- Attach a small ribbon or string to one of the star points for hanging. Secure it with a stitch or a small knot.
These vibrant stars are perfect for decorating trees, wreaths, and gift wrapping. Make a whole set in rainbow colors to create a bold, festive statement!
Colorful Felt Christmas Tree Ornaments
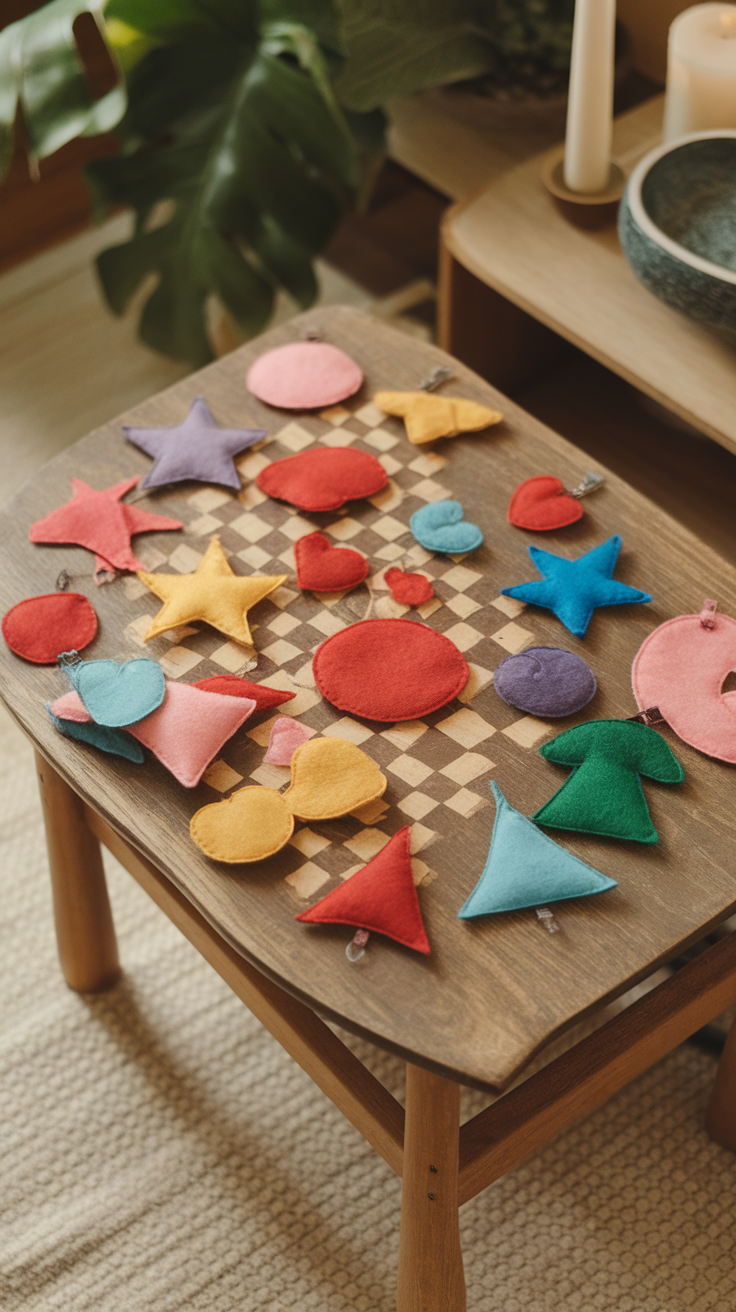
6. Colorful Felt Christmas Shape Ornaments
These simple and vibrant felt shapes are perfect for adding playful charm to your holiday decor. From stars to hearts to trees, they’re versatile, easy to make, and great for crafters of all skill levels. Mix and match colors to create a fun, modern look!
Supplies:
- Assorted colorful felt sheets
- Fabric chalk or templates (stars, trees, hearts, circles, triangles)
- Embroidery thread (contrasting or matching colors)
- Needle
- Polyester stuffing
- Scissors
- Ribbon or string (for hanging)
- Fabric glue (optional for extra details)
How to Make It:
- Choose Your Shapes:
- Use fabric chalk or a template to trace shapes like stars, hearts, circles, and trees onto colorful felt sheets.
- Cut two identical pieces for each ornament.
- Stitch the Shapes:
- Place two pieces of felt together. Use a blanket stitch or running stitch to sew along the edges.
- Leave a small section open for stuffing.
- Stuff the Ornaments:
- Gently fill each shape with polyester stuffing to give it a soft, plump look.
- Sew the opening shut.
- Add a Hanging Loop:
- Attach a small piece of ribbon or string to the top of each ornament. Secure it with a few stitches or a dab of glue.
- Customize (Optional):
- Add extra details like small felt cutouts, buttons, or decorative stitching to personalize each ornament.
These colorful felt shapes are a fun and festive addition to your Christmas tree, garlands, or gift wrapping. Create an assortment in various colors for a cheerful holiday vibe!
Felt Heart Ornaments for Valentine’s Day

7. Felt Heart Ornaments
These lovely felt heart ornaments are perfect for adding a warm, handmade touch to your Christmas tree. They’re simple to make, versatile for any season, and can be customized with embroidery, stitching, or layered designs.
Supplies:
- Red and pink felt sheets (various shades)
- Embroidery thread (in contrasting or matching colors)
- Needle and thread
- Polyester stuffing
- Fabric chalk or heart templates
- Scissors
- Ribbon or string (for hanging)
- Decorative elements (optional: beads, sequins, or smaller felt hearts)
How to Make It:
- Cut the Heart Shapes:
- Trace and cut two identical heart shapes from felt. You can use different sizes or shades of red and pink for variety.
- Add Decorative Stitching:
- Use embroidery thread to add embellishments like small stitches, snowflake designs, or outlines. Layer a smaller felt heart on top for added dimension.
- Pro tip: Use running stitches, blanket stitches, or cross-stitches for a decorative effect.
- Assemble the Hearts:
- Place the two heart shapes together and stitch around the edges using a blanket stitch. Leave a small section open for stuffing.
- Stuff and Seal:
- Gently fill the heart with polyester stuffing to give it a soft, plush look. Sew the opening shut.
- Add a Hanging Loop:
- Attach a small ribbon or string to the top of the heart for easy hanging.
- Optional Embellishments:
- Add beads, sequins, or additional embroidery to make each heart unique and festive.
These felt hearts are perfect for your tree, garlands, or even as gifts for loved ones. Make a collection in various shades and sizes for a cozy, heartfelt holiday display!
They are also a cute way to celebrate Valentine’s Day. Toss them into the box right next to the gift you’re giving.
Or go all the way DIY and make a mason jar full of valentine hearts.
Nature-Inspired Felt Leaf Ornaments
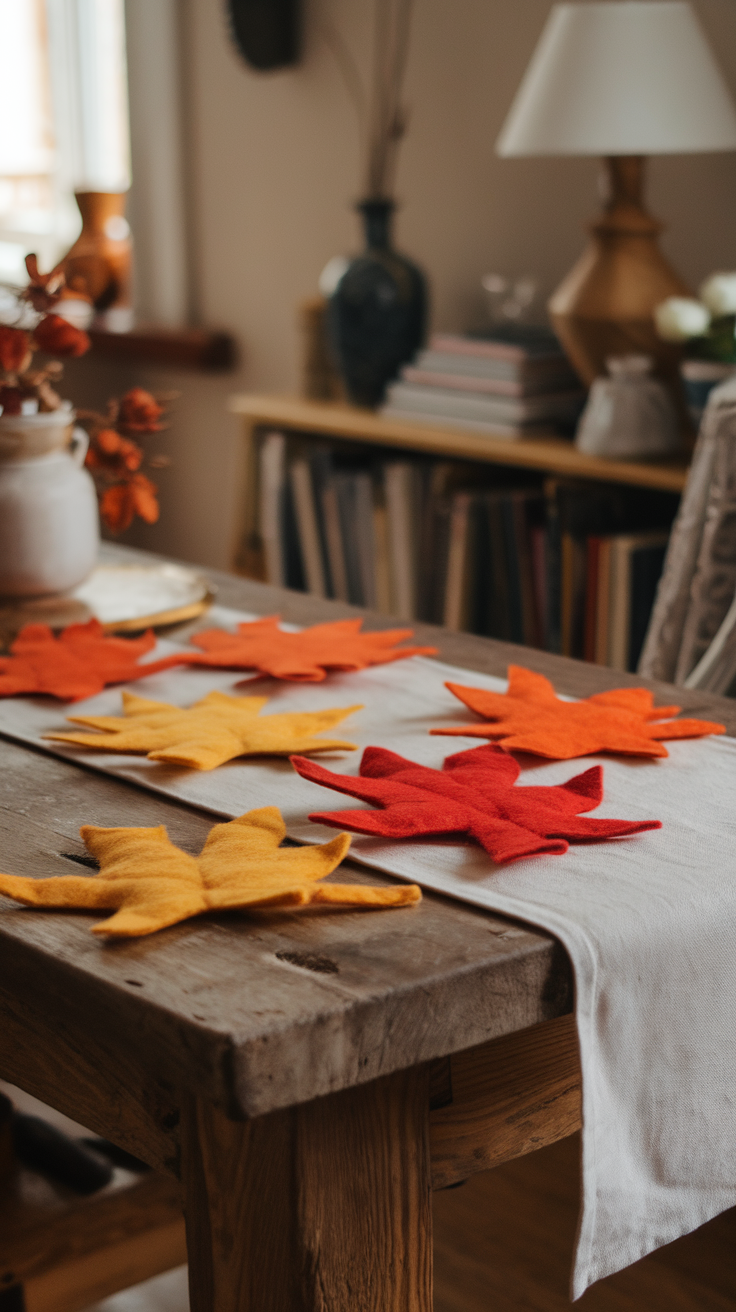
8. Nature-Inspired Felt Leaf Ornaments
Bring the cozy charm of fall foliage into your holiday decor with these felt leaf ornaments. Perfect for rustic trees, table settings, or even garlands, these vibrant leaves are simple to make and look stunning in rich autumn colors.
Supplies:
- Red, orange, and yellow felt sheets
- Fabric chalk or leaf templates (maple, oak, or other leaf shapes)
- Embroidery thread (in matching or contrasting shades)
- Needle and thread
- Scissors
- Ribbon or twine (for hanging, optional)
How to Make It:
- Trace and Cut the Leaves:
- Use leaf templates (or freehand draw) to trace shapes like maple, oak, or birch leaves onto the felt sheets.
- Cut out two identical pieces for each leaf ornament.
- Add Details:
- Using embroidery thread, stitch veins or outlines onto one of the leaf cutouts. This adds a realistic and decorative effect.
- Use a running stitch or backstitch to create clean lines.
- Assemble the Leaves:
- Place the two leaf shapes together. Sew around the edges with a blanket stitch or running stitch. You can leave them flat or add a small amount of stuffing for a 3D effect.
- Optional Hanging Loop:
- If you’d like to hang the leaves, attach a small piece of ribbon or twine to the top of each leaf.
- Display and Decorate:
- Scatter the leaves as table decor, hang them on the Christmas tree, or string them together for a festive garland.
These felt leaves are a beautiful way to incorporate nature-inspired elements into your holiday crafts. Use bold autumn hues for a warm, seasonal look or customize them with frosty greens for a winter woodland vibe.
Simple Felt Bauble Ornaments

9. Simple Felt Bauble Ornaments
These colorful felt bauble ornaments are a modern take on classic holiday decor. They’re simple, quick to make, and perfect for adding pops of color to your Christmas tree or minimalist holiday displays.
Supplies:
- Assorted colorful felt sheets
- Embroidery thread (matching or contrasting)
- Needle and thread
- Polyester stuffing or wool roving
- Ribbon or string (for hanging)
- Scissors
How to Make It:
- Cut Out Circles:
- Trace and cut out two identical felt circles for each bauble. Use a small glass or jar lid as a template for perfect circles.
- Stitch the Edges:
- Place the two felt circles together. Stitch around the edges using a blanket stitch or running stitch, leaving a small opening at the top.
- Stuff the Bauble:
- Gently fill the bauble with polyester stuffing or wool roving to give it a soft, rounded shape.
- Tip: Don’t overstuff! The bauble should look plump but not stretched.
- Add the Hanging Loop:
- Cut a small piece of ribbon or string. Fold it in half to create a loop and insert the ends into the opening of the bauble.
- Secure the ribbon by stitching the opening shut.
- Finishing Touches:
- Repeat the process with different colors for a beautiful rainbow of baubles. You can also stitch decorative patterns or initials for a personal touch.
These simple felt baubles are perfect for quick holiday crafting sessions and make excellent gifts or additions to garlands, wreaths, and tree decor.
Festive Felt Holiday Wreath Ornaments
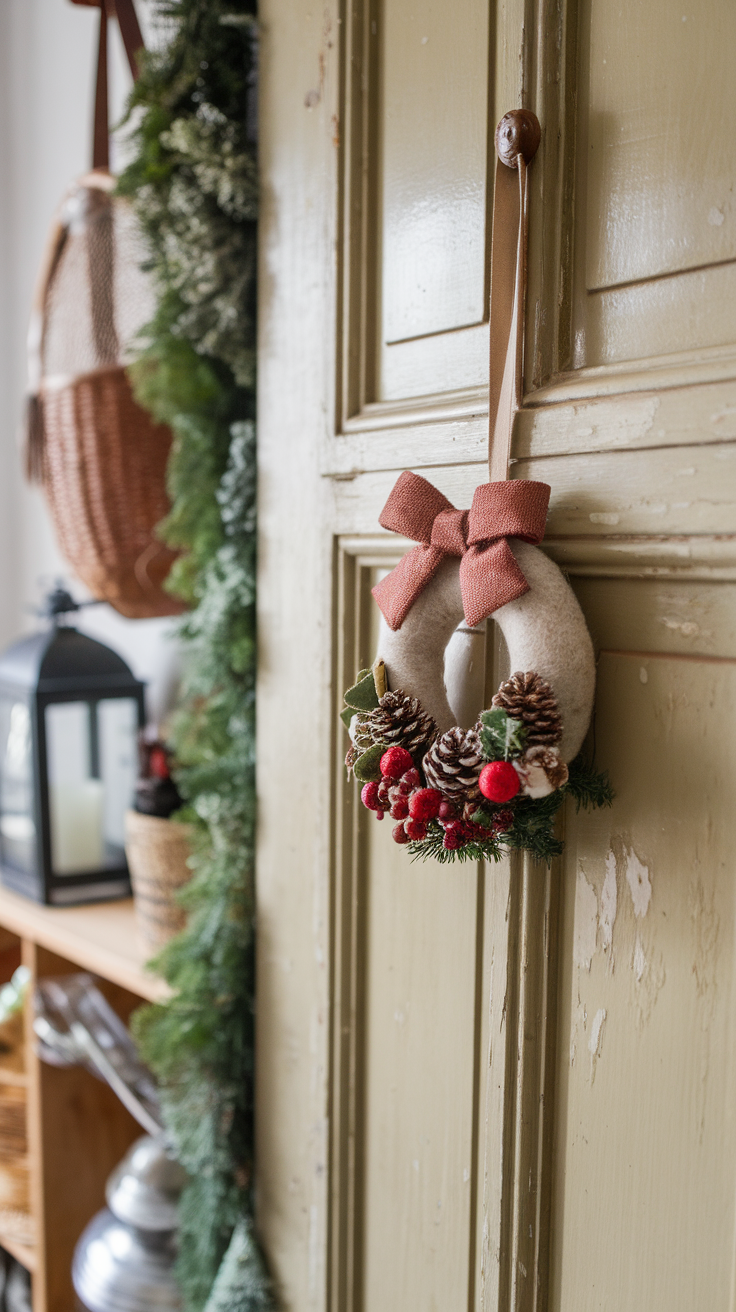
10. Festive Felt Holiday Wreath Ornament
This charming felt wreath ornament brings timeless elegance to your holiday decor. Adorned with mini pinecones, berries, and a festive bow, it’s a beautiful handmade accent for doors, trees, or gifts.
Supplies:
- White or cream felt (for the wreath base)
- Red felt or burlap ribbon (for the bow)
- Mini pinecones, faux berries, and greenery sprigs
- Hot glue gun or fabric glue
- Scissors
- Polyester stuffing (optional for a plush look)
- Ribbon or twine (for hanging)
How to Make It:
- Create the Wreath Base:
- Cut two identical ring shapes from the felt to form the base of the wreath.
- Tip: Use a bowl or plate as a template for the outer circle and a smaller object for the inner circle.
- Assemble the Wreath:
- Place the two felt rings together and stitch around the edges using a blanket stitch. For a plush look, lightly stuff the wreath with polyester filling as you stitch.
- Add the Bow:
- Create a bow using red felt or burlap ribbon. Attach it to the top of the wreath with a few stitches or hot glue.
- Decorate with Pinecones and Berries:
- Glue small pinecones, faux berries, and greenery sprigs to the bottom of the wreath. Layer the elements to create a full and festive look.
- Attach the Hanging Ribbon:
- Secure a piece of ribbon or twine to the top of the wreath for hanging.
This felt holiday wreath ornament is a delightful project for adding rustic charm to your decor. Hang it on a door, a Christmas tree, or use it as a unique gift topper.
Pair your handmade ornaments with a thoughtful presentation. Make your own DIY gift boxes with Cricut templates to create a holiday gift everyone will love.


