
When I was little, I always dreamed of having the cutest lemonade stand on the block. Now, as a mom who loves crafting, I get to make that dream come true for my kids!
I’ll show you how to make a cheerful lemonade stand sign using a laser cutting machine. We’ll cover everything from selecting materials to troubleshooting common issues.
Whether you’re looking to create a unique sign for your kids or thinking about making extras for friends, this guide has got you covered. Let’s dive in and make something special together!


I get commissions for purchases made through some of the links in this post. There is no extra cost to you. See my full disclosure here.
Materials Needed
Before we start, gather all the materials you’ll need for this project:
- 1/4 inch Baltic birch wood
- Laser cutting machine
- Paint (yellow, white, green)
- Sandpaper
- Transfer tape
- Glue
- Denatured alcohol
You can find these materials at your local craft store or online retailers like Etsy and Amazon Handmade.
Step-by-Step Instructions
Designing the Sign
First, you need to choose or create a design for your lemonade stand sign. A great place to find designs is Creative Fabrica, where you can download the Lemonade Stand SVG Bundle.
Preparing the Wood
Next, select and prep your Baltic birch wood. Make sure the wood is smooth and free of any debris. Paint the wood in your desired colors (like yellow, white, and green) and let it dry completely before cutting. This step helps avoid any smudging or uneven coloring.
Setting Up the Laser Cutter
Upload your SVG file to the laser cutting machine design software program. Adjust the settings to ensure a perfect cut. For Baltic birch wood, you might need to customize the speed and power settings to avoid burning or incomplete cuts.
Cutting the Pieces
Follow the step-by-step process in your software to cut the wood. Keep an eye on the cutting process to ensure everything is going smoothly. If you encounter issues like incomplete cuts or burning, adjust the settings and try again.
Cleaning and Assembling the Sign
After cutting, clean the pieces using denatured alcohol to remove any residue. Assemble the sign by gluing the pieces together. Arrange the parts carefully and let the glue dry completely. For a rustic look, you can sand the edges and apply a bit of wax.
Troubleshooting Tips
If you face any common issues like incomplete cuts, wood burning, or transfer tape not sticking, here are some solutions:
- Adjust laser settings for a cleaner cut.
- Use a heavier tack transfer tape.
- Clean the wood thoroughly before applying tape.
Creative Ideas and Variations
Personalize your lemonade stand sign by adding names or custom messages. You can also experiment with different color schemes or create other summer-themed signs. The possibilities are endless!
3 Easy Lemonade Stands
If you need some inspiration, check out these lemonade stand signs that can be made with a laser cutting machine:
1. Pretty Lemonade Stand Sign
A charming homemade lemonade sign that will brighten any stand.

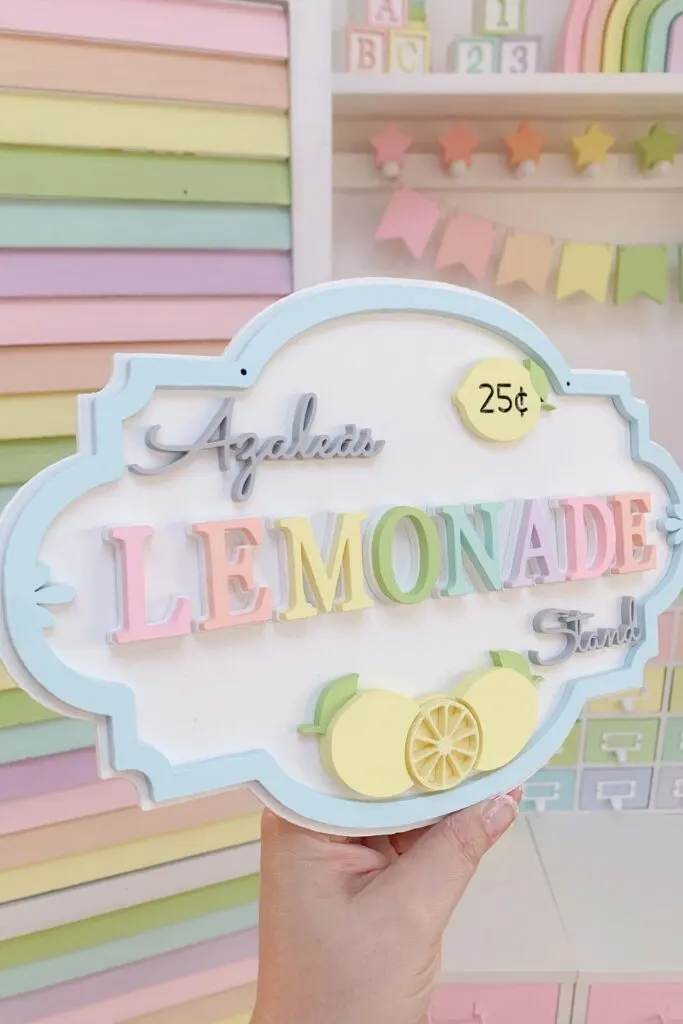
2. Lemonade Stand Kit
A complete kit that includes everything you need to set up a lemonade stand.


3. Fresh Market Lemonade Sign
A fresh market style lemonade sign cutout that adds a professional touch.


Tutorial to Make an Easy Sign
Watch the video below to see how easy they are to make.
Conclusion
Yes, it’s possible! You’ve got this! Making a lemonade stand sign is a project that you’ll love making and the kids will love the results.
If you enjoyed this project, you’ll love exploring more laser engraving projects that can elevate your crafting game. Check out my detailed guide on some amazing laser engraving projects to try next.
