
Learn how to draw santa claus with the step-by-step tutorial and video. The steps are easy enough for anyone to follow. The instructions can be used to make a santa claus drawing with a pencil and paper or with a digital drawing tablet.
The video shows you each of the steps and includes tips and shortcuts. If you’re a crafter, you’ll love the fact that you’ll be able to upload your finished drawing to Cricut.
You can print the instructions and the template below. If you follow this tutorial, you’ll learn how to draw santa claus.
There is also a Santa coloring page if you want an even easier art activity.
After you draw Santa Claus, you can make a Christmas holiday scene by drawing a snowman next to him and maybe even draw a santa hat on him.
If you want to learn how to make more digital drawings, you’ll love my So Simple SVG course.


I get commissions for purchases made through some of the links in this post. There is no extra cost to you. See my full disclosure here.
Crafts to Make with Santa Claus
The nice thing about digital drawings is that they can be easily transformed into physical drawings for lots of craft projects.
Here are some crafts that you can make with your Santa Claus drawing:
- Cupcake toppers with Santa
- Personalized Santa Sack
- Santa Claus shirt
- Chrismas mug for Santa
- Santa Claus ornament

Get the Santa cupcake toppers from Dreams By the River
Those are just a few ideas to get you started. Check out my post for more ideas for beginner crafts.
You’ll see that you can use your template for more than just papercrafts and fabric crafts.

Find the Santa sacks at My Sister and Me Shop
If you have a Cricut or Silhouette machine and a heat press, you can use it to make iron-on templates for stockings.
How easy would it be to make DIY Christmas gifts with this Santa Claus drawing?! Try using heat transfer vinyl or adhesive vinyl to apply your drawing to hard and soft surfaces like ornament storage containers or a pair of baby shoes.
As you can see, you can take your drawing and transfer it to lots of physical crafts!
This is just one of the ways that you can draw for fun or start a craft business that makes money from home.


How to Draw Santa Claus for Beginners
Start by assembling your materials to draw Santa Claus. I’ll be using Inkscape, an open-source graphic software program. If you like to draw on your tablet, you can see my post on how to use an online drawing app for Inkscape.
I like to use the calligraphy and brush strokes tool. The settings that I use are in the instruction sheet at the bottom of the post.
If you’re making the digital version, make sure that your settings on the calligraphy tool look like mine before you start drawing.
Pro Tip: If you need help, you can download the template to help you make the base of Santa Claus.
For more details, see the pictures and instructions below and follow the step by step video.
Drawing Supplies
Drawing Supplies
Here is a list of drawing supplies. The first set is for drawing in the traditional method on paper.
The last set is for digital drawing.


drawing pencils
Amazon Basics Sketch and Drawing Art Pencil Kit - 17-Piece Set


Mix media paper pad
Canson XL Series Mix Media Paper Pad


Art markers
Tombow 56185 Dual Brush Pen Art Markers


Light table for tracing
LED Light Box 9x12 Inch Light Pad
Digital Art Supplies


Graphic tablet (optional)
Huion H610 Pro Graphic Drawing Tablet 8192 Pen Pressure Sensitivity with Carrying Bag and Glove
Draw a Santa Claus Face
To get started drawing the face, we’ll first draw a nose. Why a nose and not the head? Because the nose is in the middle of the face and we’re going to draw the face around the nose.
Make a sideways “C” shape for the nose. The curved part of the “C” should be at the bottom and the open part of the “C” should be at the top.
Let’s give him some eyes. Draw two circles. Inside each circle, we’ll draw a semi-circle for the pupils.
Just above his eyes, draw eyebrows. We’ll use the number “3” as a base to make the eyebrows. Draw a sideways “3”. Pretend that there is a rectangle here and continue making the “3” forms all around the rectangle. Do this over each eye.
Now that we’ve drawn Santa’s face, let’s give him a beard. We’ll draw in the mouth later.


Draw a Santa Claus Beard
After we’ve drawn the face, we can move on to the beard. We’ll use the number “3” as a base to make the beard. Starting from the right side of the nose, draw a sideways “3”.
The curved part of the “3” should be at the top and the open part should be at the bottom. Draw two more of these “3” forms going diagonally up and towards the right.
Do this same set of steps with the “3” form on the left side of the nose.
Now we’ll connect the two sides. To do this, draw a series of “3” forms from the left side, down passed the nose and back up to the right side.
Make sure to leave more space in the middle than on the sides.
Now we’ll draw a small half circle shape for his smile in the middle of his beard.
Draw a Santa Claus Hat
Once you’re done drawing Santa Claus’s face, you’re ready to draw his hat.
Let’s use the same technique that we used on the eyebrows to make the hat.
Draw a series of “3” forms around the imaginary rectangle. This will be the brim of Santa’s hat.
Now draw a diagonal line going up from the left side and then coming down.
Draw a similar line on the right side of the hat. We can now connect those two lines with a curly pom pom.
Draw a series of “3” forms in between the two lines to connect and close the lines.
You just made a hat for Santa Claus.
Draw a Santa Costume
Follow along as I draw Santa’s costume.
First, I’ll draw his arm, then his mitten, then the top of the left side of his coat.
For the right side of Santa, I’ll put his sack over his shoulder.
Make a large backward “C” shape for his sack.
Then, a small “C” below his beard and at the top of the big “C”, and another small “C” at the bottom of the big “C”.
Draw two lines for the crease in the sack.
Make three more small “C” shapes for his other mitten.
Draw a line midway down the right side of his coat.
We’ll use a series of number “3” forms to add a furry panel down the middle right side of his coat.
Now do the same thing on the left side.
Draw Santa’s Belt
Let’s give him a belt. Draw a small square in the middle of his body, then draw a larger square around that.
Make a long rectangle from the right side to the edge of the square.
Do the same thing on the left side.
Add two lines to finish the bottom of his coat.
Complete the furry panel down the middle right side and left side.
Draw another furry panel along the bottom-right edge of his coat. And add another along the bottom left side.
To make his legs, draw a line down from the coat on both sides.
Add a shorter line in the middle.
Draw Santa’s Boots
Our drawing of Santa is almost finished. We need to give him a pair of boots.
From the left pant leg, we’re going to draw a “C” shape, then a line back up to the other edge of that pant leg.
Repeat this step on the right pant leg.
You’ve drawn his boots. Doesn’t he look great?!
Our Santa Claus drawing outline is complete and you can move on to coloring the outline.
Coloring Your Santa Claus Drawing
You’re ready to color your cute drawing of Santa Claus.
To do this, use the fill bucket tool (fill bounded areas tool).
Click the fill bucket tool and then click on a color from the color menu bar at the bottom of the screen. Next, click on a section of Santa Claus to fill it with color.
Repeat this process to color in every section of Santa Claus.
Your Santa Claus drawing is done. Wasn’t that fun?!
If you liked this lesson, you’ll love my So Simple SVG Files course. I will walk you through the steps to make digital drawings using simple shapes. You’ll also learn how to transfer your drawings to your craft projects and get better use from your cutting machine.
Look for more ideas for creative craft projects that you can make easily from home.
Make sure to save this to your favorite drawing board on Pinterest. Click the link below to save it for later.
Santa Claus Drawing Easy Tutorial


Learn how to draw santa claus with this step-by-step tutorial and video. The steps are easy enough for anyone to follow. The instructions can be used to make a santa claus drawing with a pencil and paper or with a digital drawing tablet.
Materials
- Digital Drawing Supplies
- Paper Drawing Supplies
Tools
- Digital Drawing Supplies
- Inkscape software program
- Computer
- Graphic tablet (optional)
- Paper Drawing Supplies
- Drawing pencil
- Drawing Paper
- Art markers or Colored Pencils
- Light Table for Tracing (optional)
Instructions
- Draw a face starting with the nose.


- Use a series of 3's to make his beard.


- Draw a hat on top of his head.


- Add a coat, his arms, mittens and a sack.


- Give him a belt and buckle.


- Add his boots and color the Santa Claus drawing.


Notes
Calligraphy tool settings
No preset
Width: 3
Thinning: 10
Angle: 90
Fixation: 30
Caps: 0.75
Tremor: 0
Wiggle: 0
Mass:2
If you are making a digital drawing, make sure to close any gaps. This will make it easier to color the drawing using the fill bucket tool.
Put the outline in front of the color by using the Raise selection to top button
Pro Tip:
Print the template to help you make the base of Santa Claus.
Recommended Products
As an Amazon Associate and member of other affiliate programs, I earn from qualifying purchases.
-
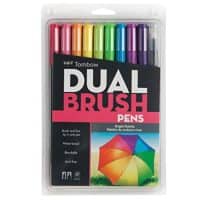
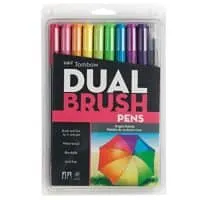 Tombow Dual Brush Pen Art Markers (Bright)
 -
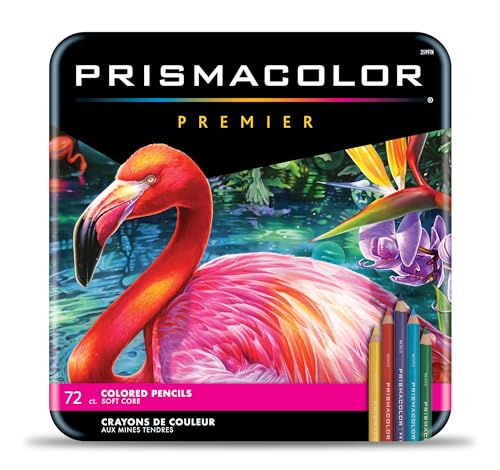 Prismacolor Premier Colored Pencils | Art Supplies for Drawing, Sketching, Adult Coloring | Soft Core Color Pencils, 72 Pack
 -

 Canson XL Series Mix Media Paper Pad,
 -

 So Simple SVG Files course
 -

 AmazonBasics Sketch and Drawing Art Pencil Kit - 17-Piece Set
 -

 Cricut EasyPress® 3 - 12 in x 10 in
