
Why Is My Sublimation Not Transferring? Here’s What You Need to Know
Sublimation transfers can be a great way to add beautiful images and designs to your DIY projects. However, sometimes things don’t go as planned and you find yourself asking ‘why is my sublimation not transferring?’.
Whether you’re new to the craft or have been working with it for years, there are many potential causes of poor transfer results that need troubleshooting before you get back on track.
In this blog post I’ll cover what sublimation is, common issues causing unsuccessful transfers and tips for successful results in future attempts.
So if your current project isn’t turning out how you’d like – read on. I’ll help make sure all your hard work doesn’t go down the drain because of common problems.


Table of Contents:
- What is Sublimation?
- Common Causes of Poor Sublimation Transfer
- How to Troubleshoot Sublimation Transfers
- Tips for Successful Sublimation Transfers
- Conclusion
- FAQs in Relation to Why is My Sublimation Not Transferring
- Conclusion
What is Sublimation?
Sublimation is a unique printing process that uses heat and pressure to transfer an image onto a substrate (aka a blank). It’s often used for creating vibrant, permanent designs on fabric, metal, ceramic, wood and other materials.
This process requires special inks, paper, and a heat press to achieve the desired results.
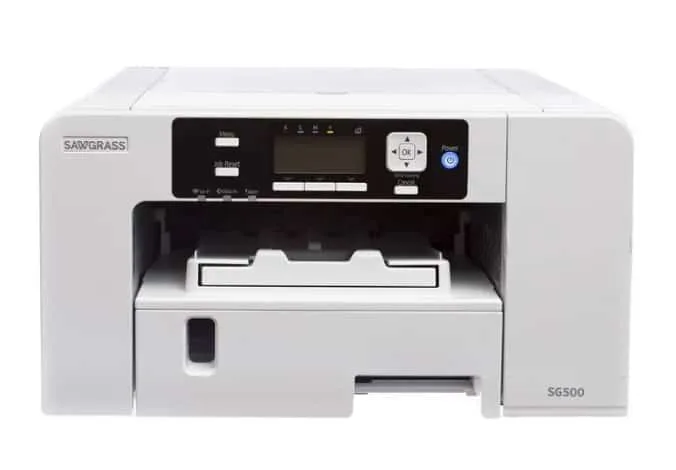
The sublimation process begins with designing or selecting an image that will be printed onto the substrate. The design is then printed onto special sublimation paper using an inkjet printer with dye-sublimation inks.

I get commissions for purchases made through some of the links in this post. There is no extra cost to you. See my full disclosure here.
Once the sublimation design has been printed it needs to be transferred from the paper to the substrate material by applying heat and pressure through heat presses or ovens.
As this happens, the ink turns into gas which bonds directly with polyester fabric or polymer coatings of hard substrates such as mugs and phone cases without leaving any residue behind on either surface.


When done correctly, this method produces high quality prints that are both durable and vibrant due to its ability to penetrate deep into fabric fibers or polymer coatings allowing for rich colors even after multiple washes or long-term use of products like mugs or tumblers.
Sublimated images also have excellent color accuracy when compared to traditional methods such as screen printing since they can reproduce up to 16 million different shades instead of just 4-6 shades available with other techniques like silk screening.
Additionally, there are no additional costs associated with setting up screens for each color used in your design making it much more cost effective than traditional methods when dealing with multi-colored designs over large quantities of items being produced at once. Ok, that’s a quick overview of the science part of it all.
Overall, sublimation offers many advantages over other types of printing processes including durability against fading over time, vivid colors, accurate reproduction, low setup costs, easy customization options, fast turnaround times and minimal waste production during production runs.
This makes it one of the most popular choices among beginners as well as pros looking for ways to produce custom products quickly while keeping their budget under control.
Sublimation is a great way to add vibrant colors and designs to your craft projects, but it can be tricky if you don’t know what you’re doing. In the next section, I’ll look at some of the common causes of poor sublimation transfer.
Common Causes of Poor Sublimation Transfer
Sublimation transfer is a process that uses heat and pressure to transfer dye-based inks onto polyester fabrics, ceramics, or other materials. Poor sublimation transfers can be caused by several factors.
Incorrect settings on the heat press are one of the most common causes of poor sublimation transfers. If the temperature is too low or if it’s not set for long enough, then the ink won’t properly adhere to the fabric or material being used. Additionally, incorrect paper type or weight can cause issues with your sublimation transfer.
For example, if you use a lightweight paper instead of heavyweight paper for transferring images onto mugs and tiles, then your image may appear faint and blurry when pressed against these surfaces.
Another issue could be improper pressing time or temperature; this means that either too much time has been spent pressing an image onto something like a mug (which will result in fading) or not enough time was given (resulting in incomplete coverage).
Furthermore, poor quality ink and/or paper can also lead to unsatisfactory results when attempting a sublimation transfer; make sure you purchase good quality supplies from reliable sources so that you get consistent results every time.

Lastly, old transfer papers should never be used as they tend to produce very inconsistent results due to their age.
To ensure successful sublimation transfers each time, it is important to double check all settings on your heat press before beginning any project. This includes making sure temperatures are correct and that the proper amount of pressure is applied during pressing times.
Additionally, high-quality ink and papers specifically designed for use with digital art projects such as crafting with cutting machines or laser engravers should be purchased in order to achieve consistent results.
Understanding the common causes of poor sublimation transfer can help you identify potential problems and take steps to prevent them. Now let’s look at how to troubleshoot sublimation transfers.
How to Troubleshoot Sublimation Transfers
Troubleshooting sublimation transfers can be a daunting task, but it doesn’t have to be. The key is to start by checking the settings on your heat press and making sure they are correct for the material you are working with.
For example, if you’re pressing onto cotton fabric, make sure that your temperature setting is at least 400°F (204°C) and that your time setting is around 45 seconds.
If you’re pressing onto polyester or other synthetic fabrics, then adjust accordingly – usually this means increasing both the temperature and time settings slightly higher than when using cotton fabric.
It’s also important to use the right type of ink and paper for your project as well as ensure that you’re using the correct pressing time and temperature.
Sublimation dyes work best when used with special sublimation transfer papers designed specifically for this purpose; these papers will help ensure better color saturation during printing as well as prevent any smudging or image fading after transferring onto a wood or fabric blank.
Additionally, always double-check that your heat press has been preheated before starting any transfer projects.
Finally, pay attention to how much pressure you apply while transferring images from paper to substrate. Too little pressure may cause colors not to show up correctly on some materials such as wood or metal surfaces; too much pressure can cause unwanted warping of substrates like plastic sheets or mugs.
By following these tips and troubleshooting techniques, you will be able to create beautiful sublimation transfers each time. Applying firm yet gentle pressure evenly across all areas being pressed is a good rule of thumb so that no one area gets more compression than another.
This will help ensure colors show up correctly on fabric substrates like polyester garments.
By understanding the basics of sublimation transfers and troubleshooting common issues, you can ensure successful results with your projects. Next, let’s look at some tips to help you get the best possible outcome when using this technique.
Tips for Successful Sublimation Transfers
It’s commonly used for customizing items such as mugs, t-shirts, and other promotional materials. To achieve successful sublimation transfers, it’s important to use the right ink and paper. Sublimation inks are specially formulated for this type of printing and should be used with papers designed specifically for sublimation printing.
When pressing your design, make sure you use a clean surface free from dirt or debris which can cause poor adhesion between the substrate and transfer paper.
Also pre-press before transferring your design to ensure good adhesion between the two surfaces – this is the best way to prevent any smudging or fading of your design when it comes time to press it onto the item you’re working on.
The temperature settings are also very important when performing sublimation transfers – too low of a temperature may not allow for full color saturation while too high of a temperature could cause damage to both the special ink and substrate being printed on.
Make sure you consult with your printer manufacturer’s instructions regarding what temperatures work best with their products so that you get optimal results every time.
Finally, always check that all colors have transferred properly after each print job by doing some simple tests like rubbing alcohol swabs or running wet fingers over the image area; if there is any discoloration present then re-printing may be necessary in order to get perfect results every time.
By following these tips, you can ensure that your sublimation transfers come out perfectly every time. In the next section, I’ll discuss how to troubleshoot if something goes wrong.
Conclusion
With the right tools, techniques, and troubleshooting you can achieve beautiful results that will last for years. When it comes to sublimation transfers, practice makes perfect. Start by testing out different materials with small pieces of fabric or paper until you get the hang of it.
When transferring an image onto a material using sublimation transfer paper, make sure that the image is printed in reverse on the special transfer paper before pressing it onto the material. This ensures that when transferred onto your project, your design will appear correctly after pressing.
Additionally, ensure that both sides of your project are properly coated with heat-resistant tape so that there won’t be any unwanted marks from the press during application.
It’s also important to pay attention to temperature and time settings when transferring images using sublimation presses as these two factors play a huge role in achieving successful results.
I know that reading can be a pain but, make sure you read and set up according to the manufacturer’s instructions or use trial-and-error methods if necessary until you find what works best for each type of material being used in order to avoid burning or undercooking images during the transfer process.
Finally, always remember that not all materials are suitable for sublimation transfers, so make sure you research ahead of time which ones work best for each project. With some patience and practice, anyone can master this technique.


FAQs in Relation to Sublimation Transfer Issues
Heat transfer paper not transferring is likely due to incorrect settings. Make sure that you’re using a heat press and not a home iron. Also, make sure the heat press temperature is set correctly for the type of material being used, and that you are pressing for long enough.
Additionally, ensure that your pressure setting is appropriate for the thickness of the material being pressed. If these steps do not resolve your issue, it may be helpful to try using butcher paper, a different brand, or type of heat transfer paper.
Sublimation transfers require a specific amount of time to press depending on the material being used. Generally, you should press your sublimation transfer for 15-20 seconds at 400°F (204°C) with medium pressure.
It is important to note that different materials may require more or less pressing time and temperature, so it is best to consult the manufacturer’s instructions before beginning. Additionally, if you are using a heat press machine, make sure that it is properly calibrated before starting your project in order to ensure accurate results.
For best results when printing for sublimation, you should set your printer to the highest quality setting. This will ensure that the different colors are vibrant and true-to-life, and that all of the details in your artwork are preserved.
Additionally, make sure to use the right type of paper designed specifically for this purpose. Finally, be sure to adjust any color settings on your printer so that they match those of the sublimation image or design you’re working with. With these steps taken care of, you can enjoy beautiful prints every time.
No, you cannot press a sublimation transfer more than once. Sublimation transfers are designed to be pressed onto a sublimation blank just one time.
The high heat and pressure of the pressing process permanently dyes the image into the fabric or other final product, making it impossible to press again without damaging the design. Additionally, any additional pressing may cause fading or discoloration of the original design, especially on something like a polyester shirt.
But it’s possible to fix common sublimation problems on hard surfaces. Pick a dark or busy design. This will ensure that the first design does not show through the second version of your transfer.
Conclusion
Sublimation transfers can be tricky to get right, but with the right knowledge and troubleshooting techniques you can achieve successful results. If your sublimation transfer is not transferring correctly, take a step back and review the process from start to finish. Consider factors such as temperature, pressure, time, and materials used in order to determine what may have gone wrong.
With some practice and patience, you will soon be able to make beautiful projects using my sublimation transferring technique.
I hope you were able to find the answer as to why your sublimations aren’t transferring correctly. With these tips, you’ll now get the best results every time. Need more sublimation craft ideas? Check out this post for the best materials that you can sublimate on.
