
Removing vinyl from your Cricut cutting mat can be challenging.
Without the right strategy, your vinyl may get stuck on the mat, get ripped, or come out curled.
If you’re looking for the right tricks to help you remove your vinyl successfully, keep reading.

What Is Vinyl?
Craft vinyl is a versatile craft material used for various projects.
You can use it to decorate glass, glazed ceramics, plastic, or even walls.
Vinyl is made up of two layers.
First Vinyl Layer
The first is the vinyl, which you cut and apply to your project surface.
This layer has a sticky back.
Second Vinyl Layer
The second layer is a lining that prevents the vinyl from unintentionally sticking to other items.
You can use a Cricut machine to cut vinyl. This is one of the best ways to create elaborate designs and cut them accurately, which can be difficult when done by hand.


Types of Vinyl
There are two types of craft vinyl; heat transfer vinyl and adhesive vinyl or iron-on, as Cricut calls it.
Adhesive Vinyl
Adhesive vinyl works like a regular sticker, where you remove the protective liner and apply the sticker on the surface by applying pressure.
Iron-on Vinyl
For the iron-on, you have to apply heat for it to stick. This type is mainly used on clothing or other items made of fabric.
The vinyl type we are covering in this article is adhesive vinyl.
More about Adhesive Vinyl
You can get adhesive vinyl in two types; permanent or removable.
The permanent version is more adherent, making it last longer. It is best for projects exposed to more wear and tear, such as mugs and window decals.


The removable type has limited adhesion, meaning you can remove it if need be.
It also doesn’t leave a residue behind after removal.
You should go for this type of vinyl if you plan to have temporary décor.
It is also ideal for wall decals because it won’t rip off your paint.
Adhesive vinyl also comes in a range of colors and surface finishes.
Depending on your project, you can choose glossy, matte, glitter, or holographic vinyl.


Removing Vinyl from Your Cricut Cutting Mat
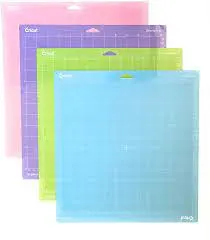
To cut vinyl, you can use a standard-grip or light-grip mat.
After cutting and weeding your project design, the next step is to remove it from the mat.
The best strategy for this is to peel off the mat instead of the project.
This protects the vinyl from curling, bubbling, or ripping.

Steps to Remove Vinyl from a Cutting Mat
- Start by flipping the mat over to have the vinyl facing down.
- Then, bend the mat back, hold your vinyl straight, and pull the mat.
- Ensure that the vinyl stays straight the whole time while the mat stays bent while you remove it.
- Do this slowly and carefully.
- Repeat the process if any project parts are left stuck on the mat.
Even with small vinyl parts such as letters, it is advisable to hold them straight to prevent curling.
Simple Trick to Reduce Stickiness of Mats
If you’re using a new mat, you might find it too sticky.
A trick you can use to make it less sticky is to pat it down with a t-shirt. This will make removing your project much more manageable.
Which mats can I use with my Cricut machine?
A lot of these issues can be avoided by choosing the right mat to use. Check out this guide from Cricut which explains which mat to use.
Conclusion
Removing vinyl from your Cricut mat doesn’t have to end in a mess.
If you use the right mat and peel it off instead of your project, you should have a successful removal.
If it’s still too sticky, try the t-shirt trick.
